XENOGOTCHI
Client: Personal My Role: Concept, Direction, 3D, Animation
THE CONCEPT
XenoGotchi started as a simple question: what if Weyland-Yutani had sold the xenomorph as a 1990s handheld toy?
The model needed a package. The package needed a commercial. The commercial needed a world. That’s how a single mashup concept became a five-part short film anthology, tracing the organism from a classified Weyland laboratory to fictional retail shelves.
Conceived and produced solo.The discipline was knowing when to follow the idea, and when to stop.
The thematic spine is taken directly from Dan O’Bannon’s original thesis on Alien: the corporation, not the creature, is the real monster.
That idea shapes every creative decision here, from the Weyland lab aesthetic in Part 1 to the cheerful disclaimer in the toy commercial.
Horror doesn’t need a monster when the packaging is convincing enough. “Tamago” means egg in Japanese, and the ovomorph was always the product.
THE PRODUCT
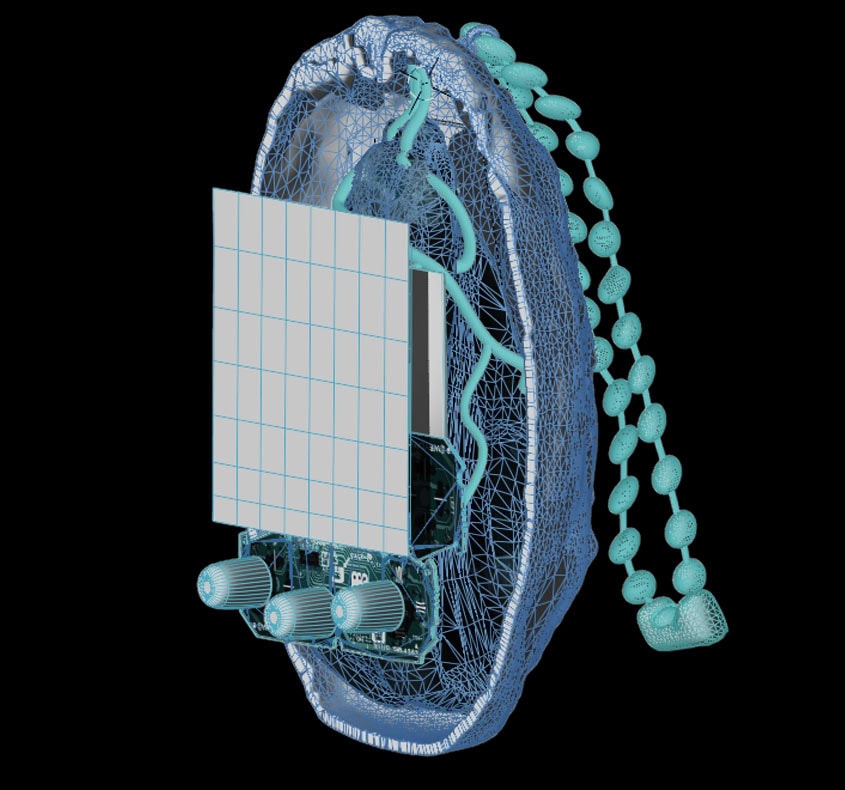
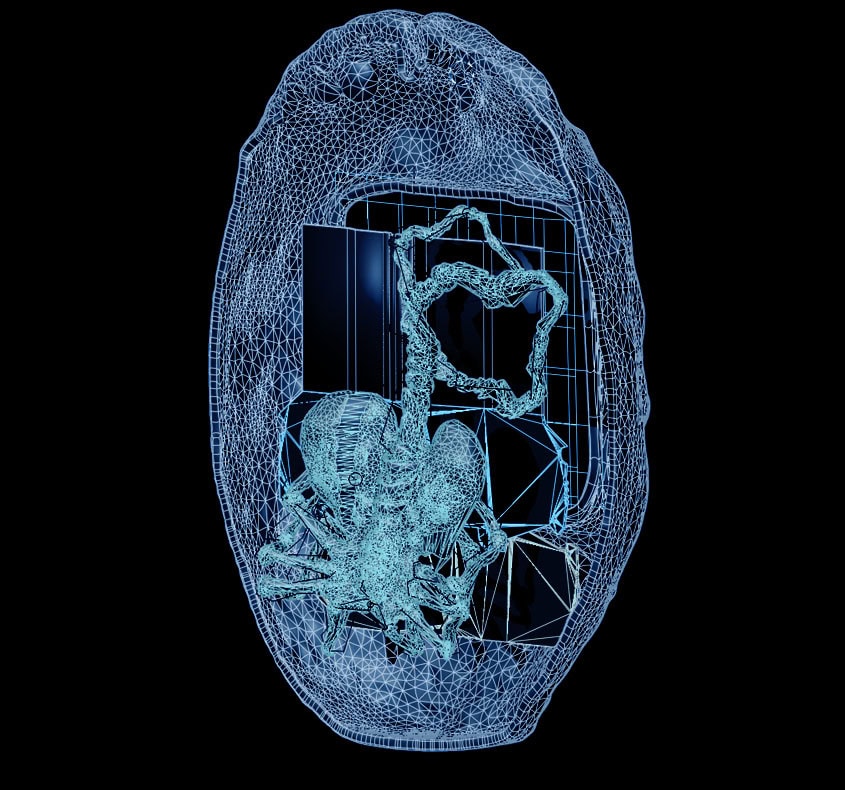
The XenoGotchi unit had to feel like something Weyland had actually manufactured, not a toy that happened to carry a xenomorph. The form was derived directly from the ovomorph, the egg encountered in the original film, with the same tapered silhouette and a deliberate opening at the top that mirrors how the egg breaches.
Screen, buttons, and chain were added as the minimum required to make it a consumer product.The surface detail was sculpted by hand. The shell is utilitarian. The screen is the only thing alive.
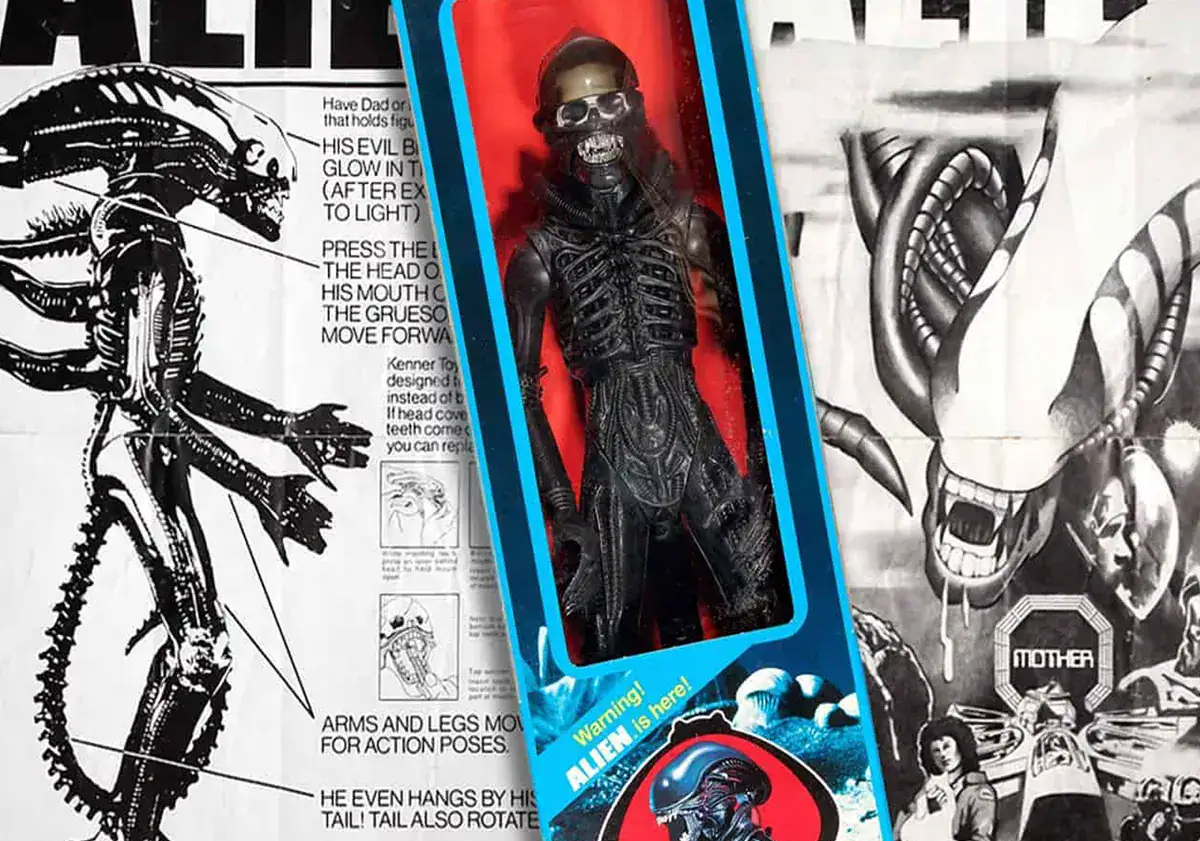
THE PACKAGE

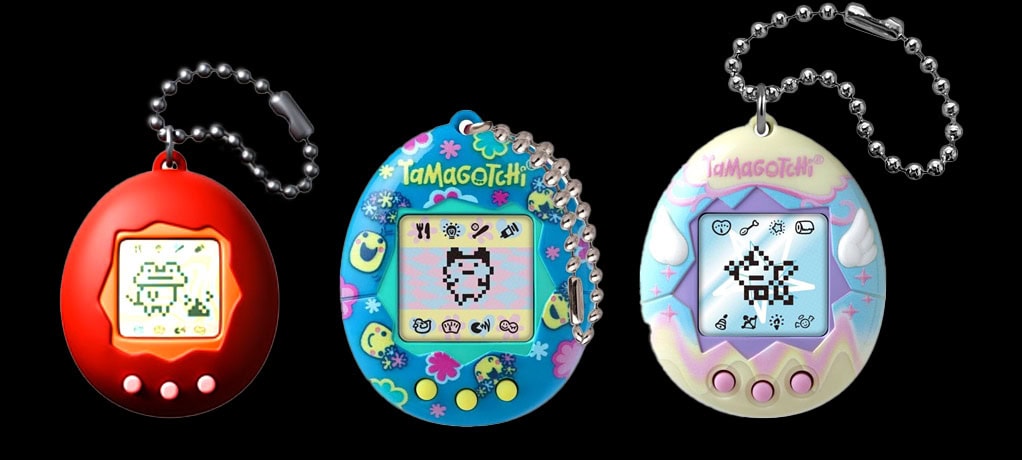
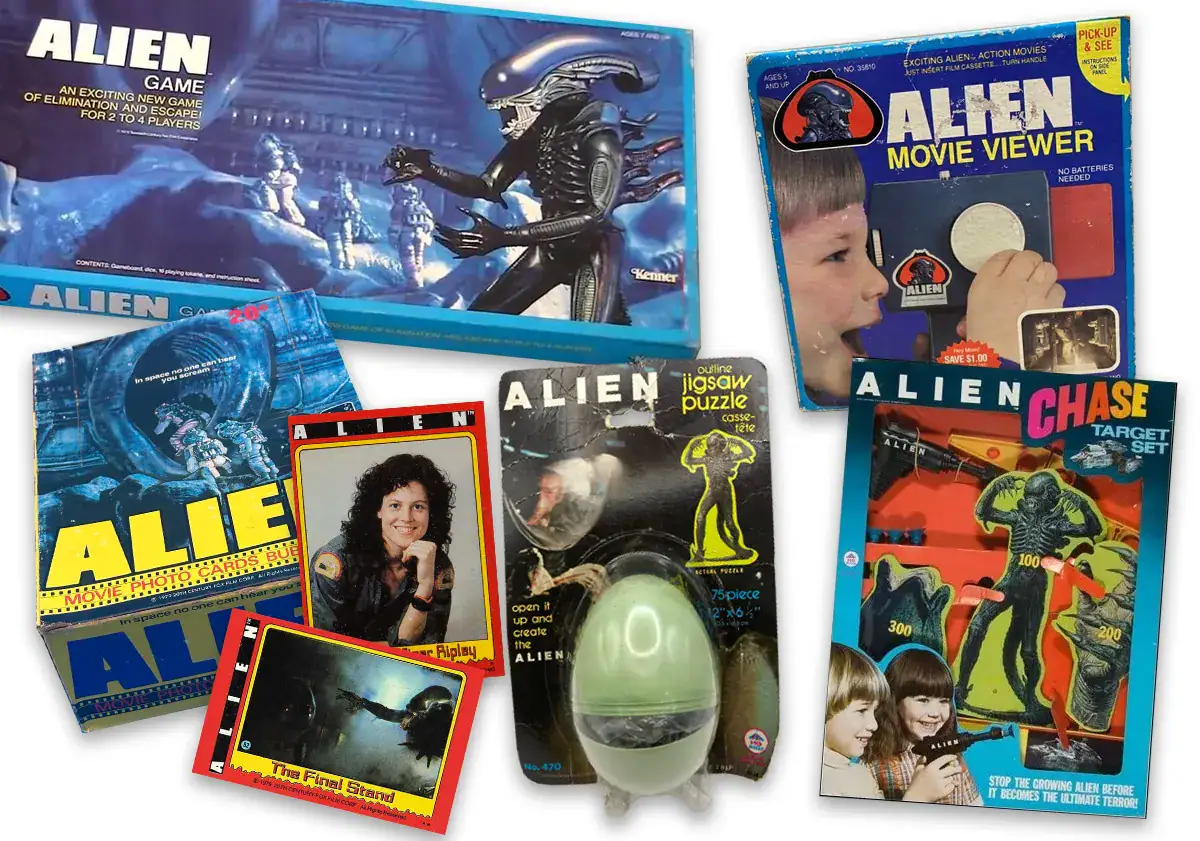
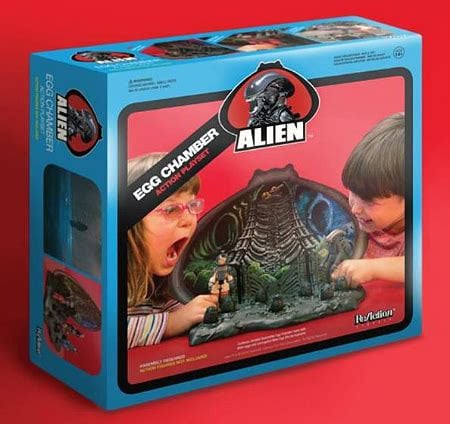
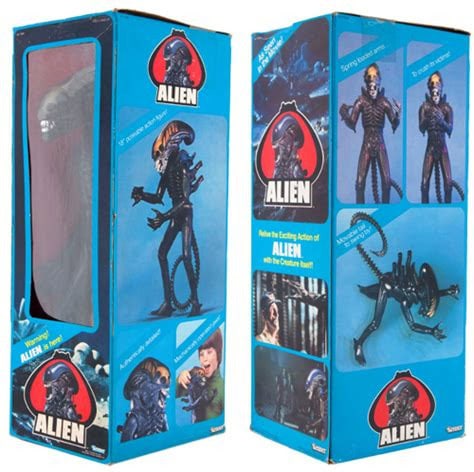
The packaging design is rooted in a specific reference: the Kenner Alien line from 1979. Not a generic blister pack, but that particular combination of deep cyan blue, red accent trim, and the implicit promise that something dangerous was sealed inside.
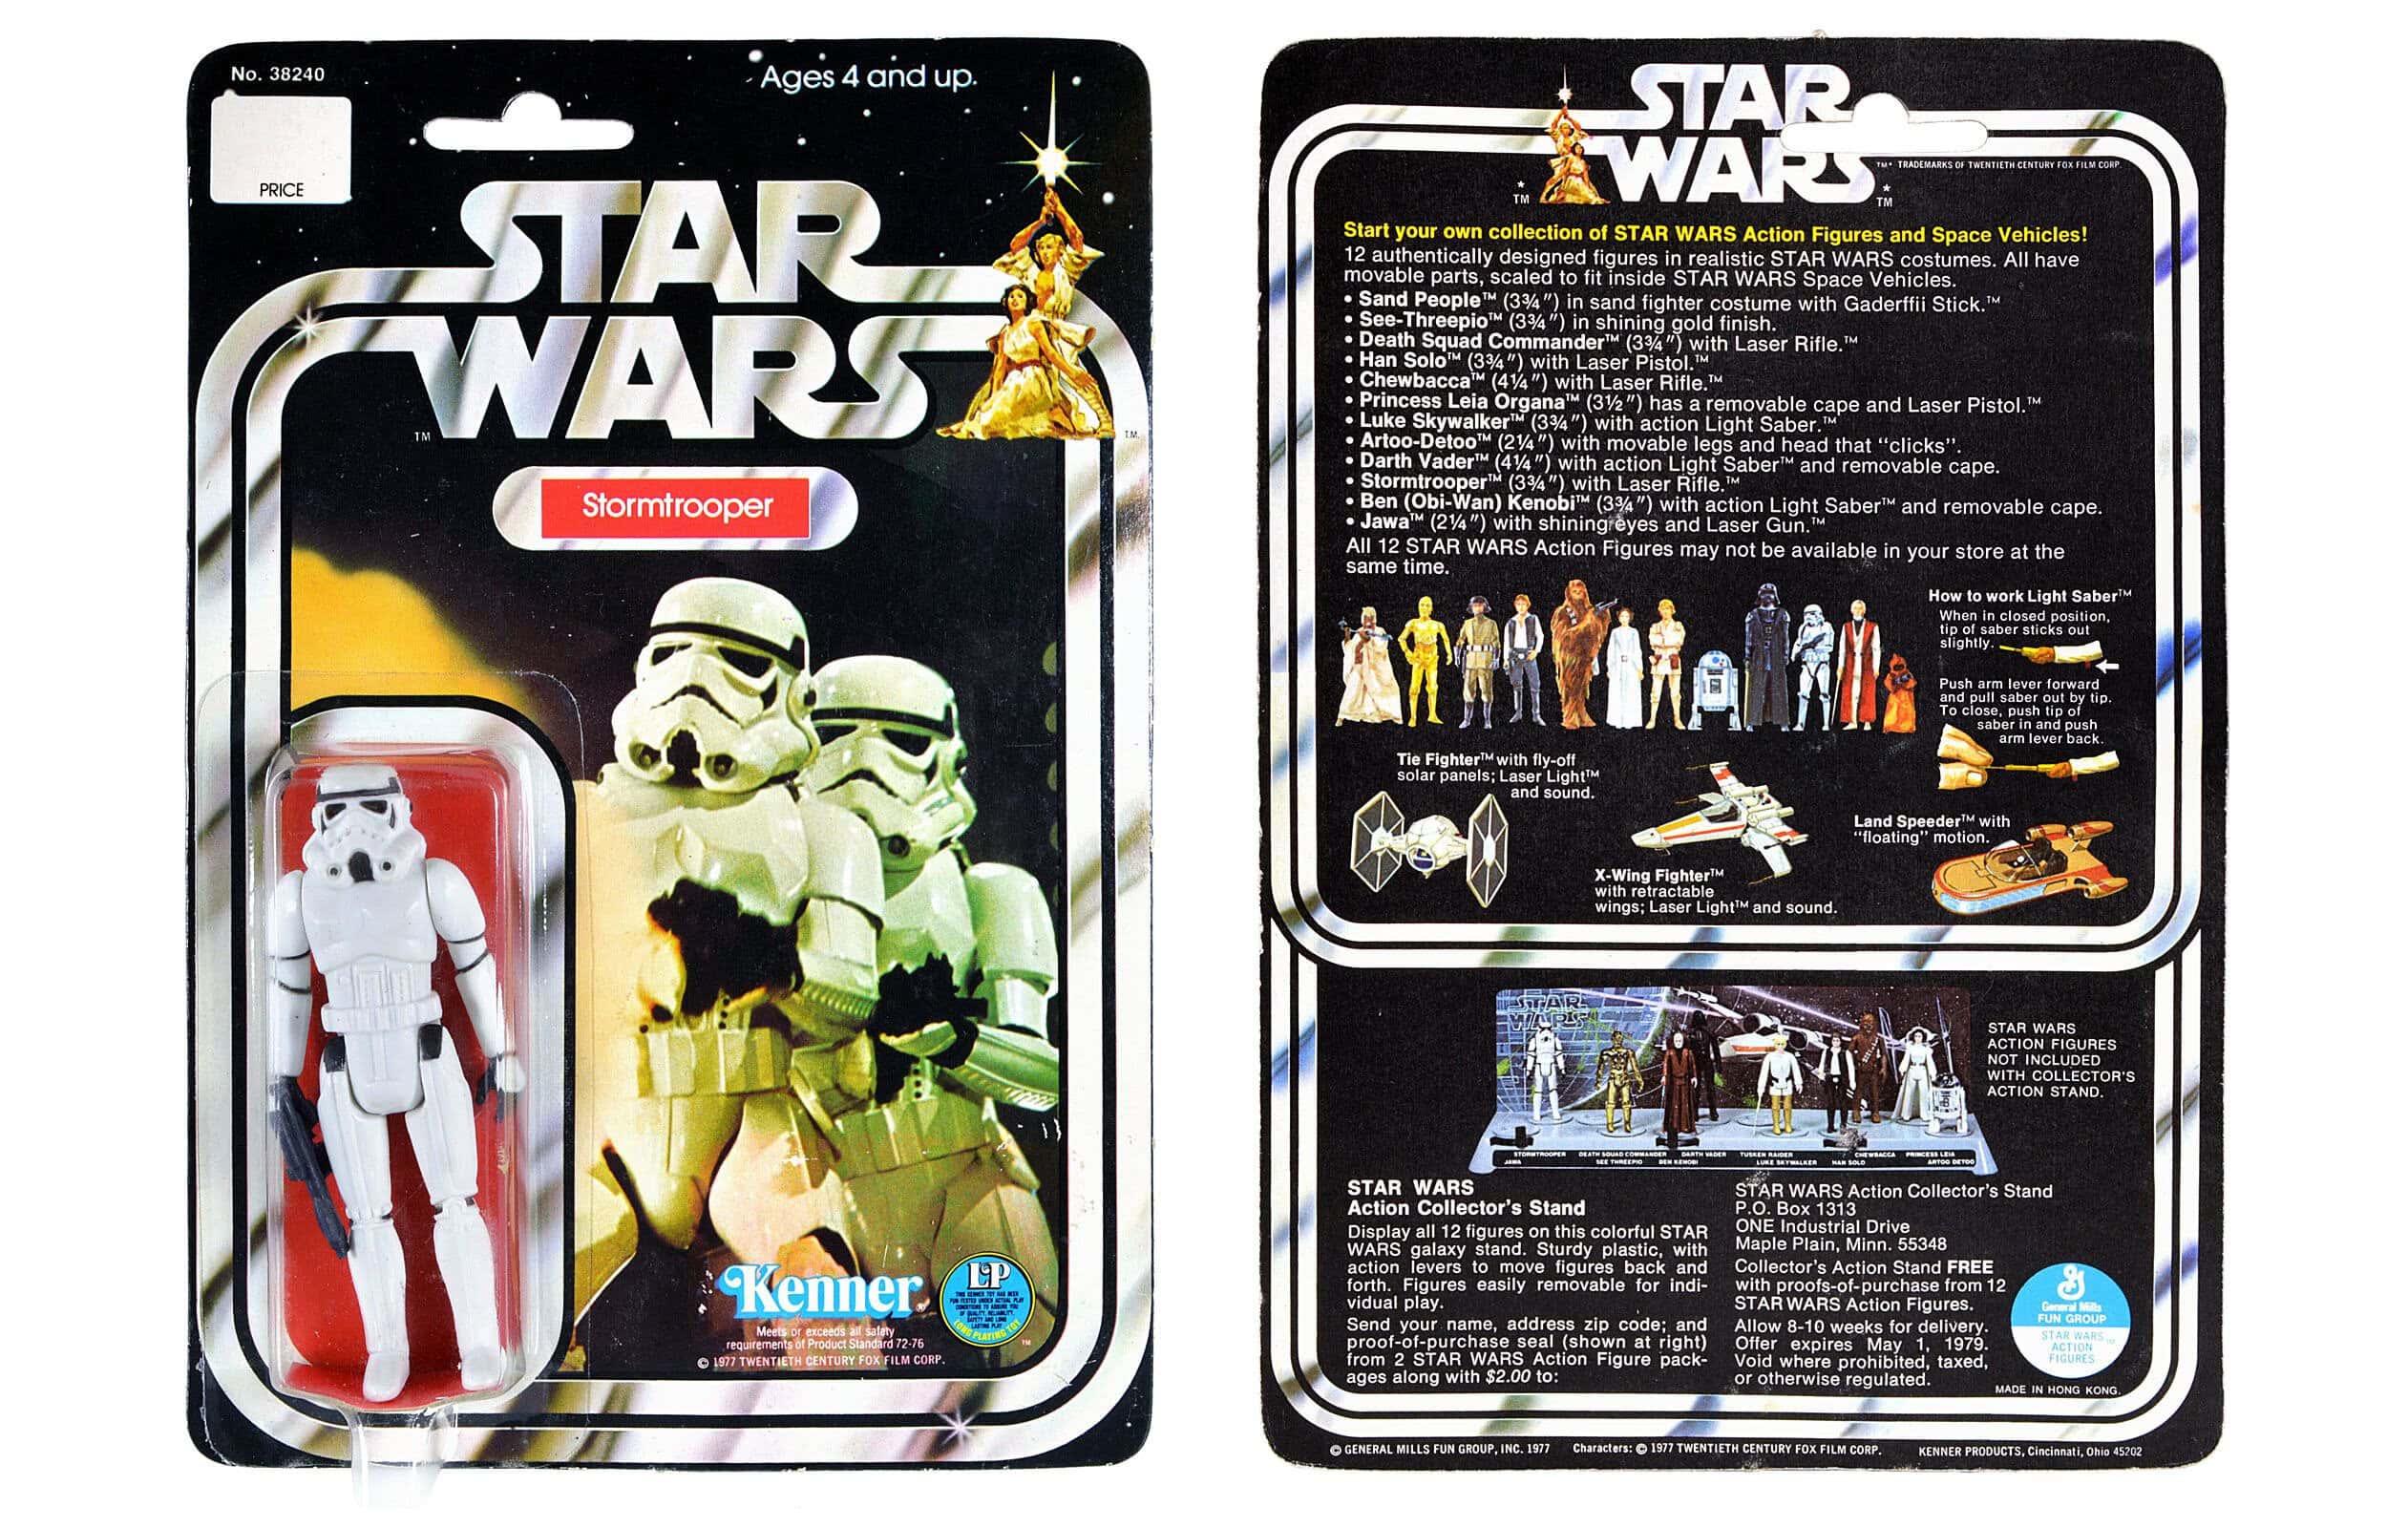
The same visual language runs through Kenner’s Star Wars line from 1977-78. Cheap cardboard and a plastic bubble, mass-produced by the millions.
But for a child holding one in a toy store, it was a window into another universe. Growing up with Star Wars figures from that era, that promise felt real.
Applied to a Weyland-Yutani product, the same packaging becomes something else entirely. Corporate livery dressed as toy store shelf appeal. The blue is familiar. The red makes it feel urgent. The organism is already inside.
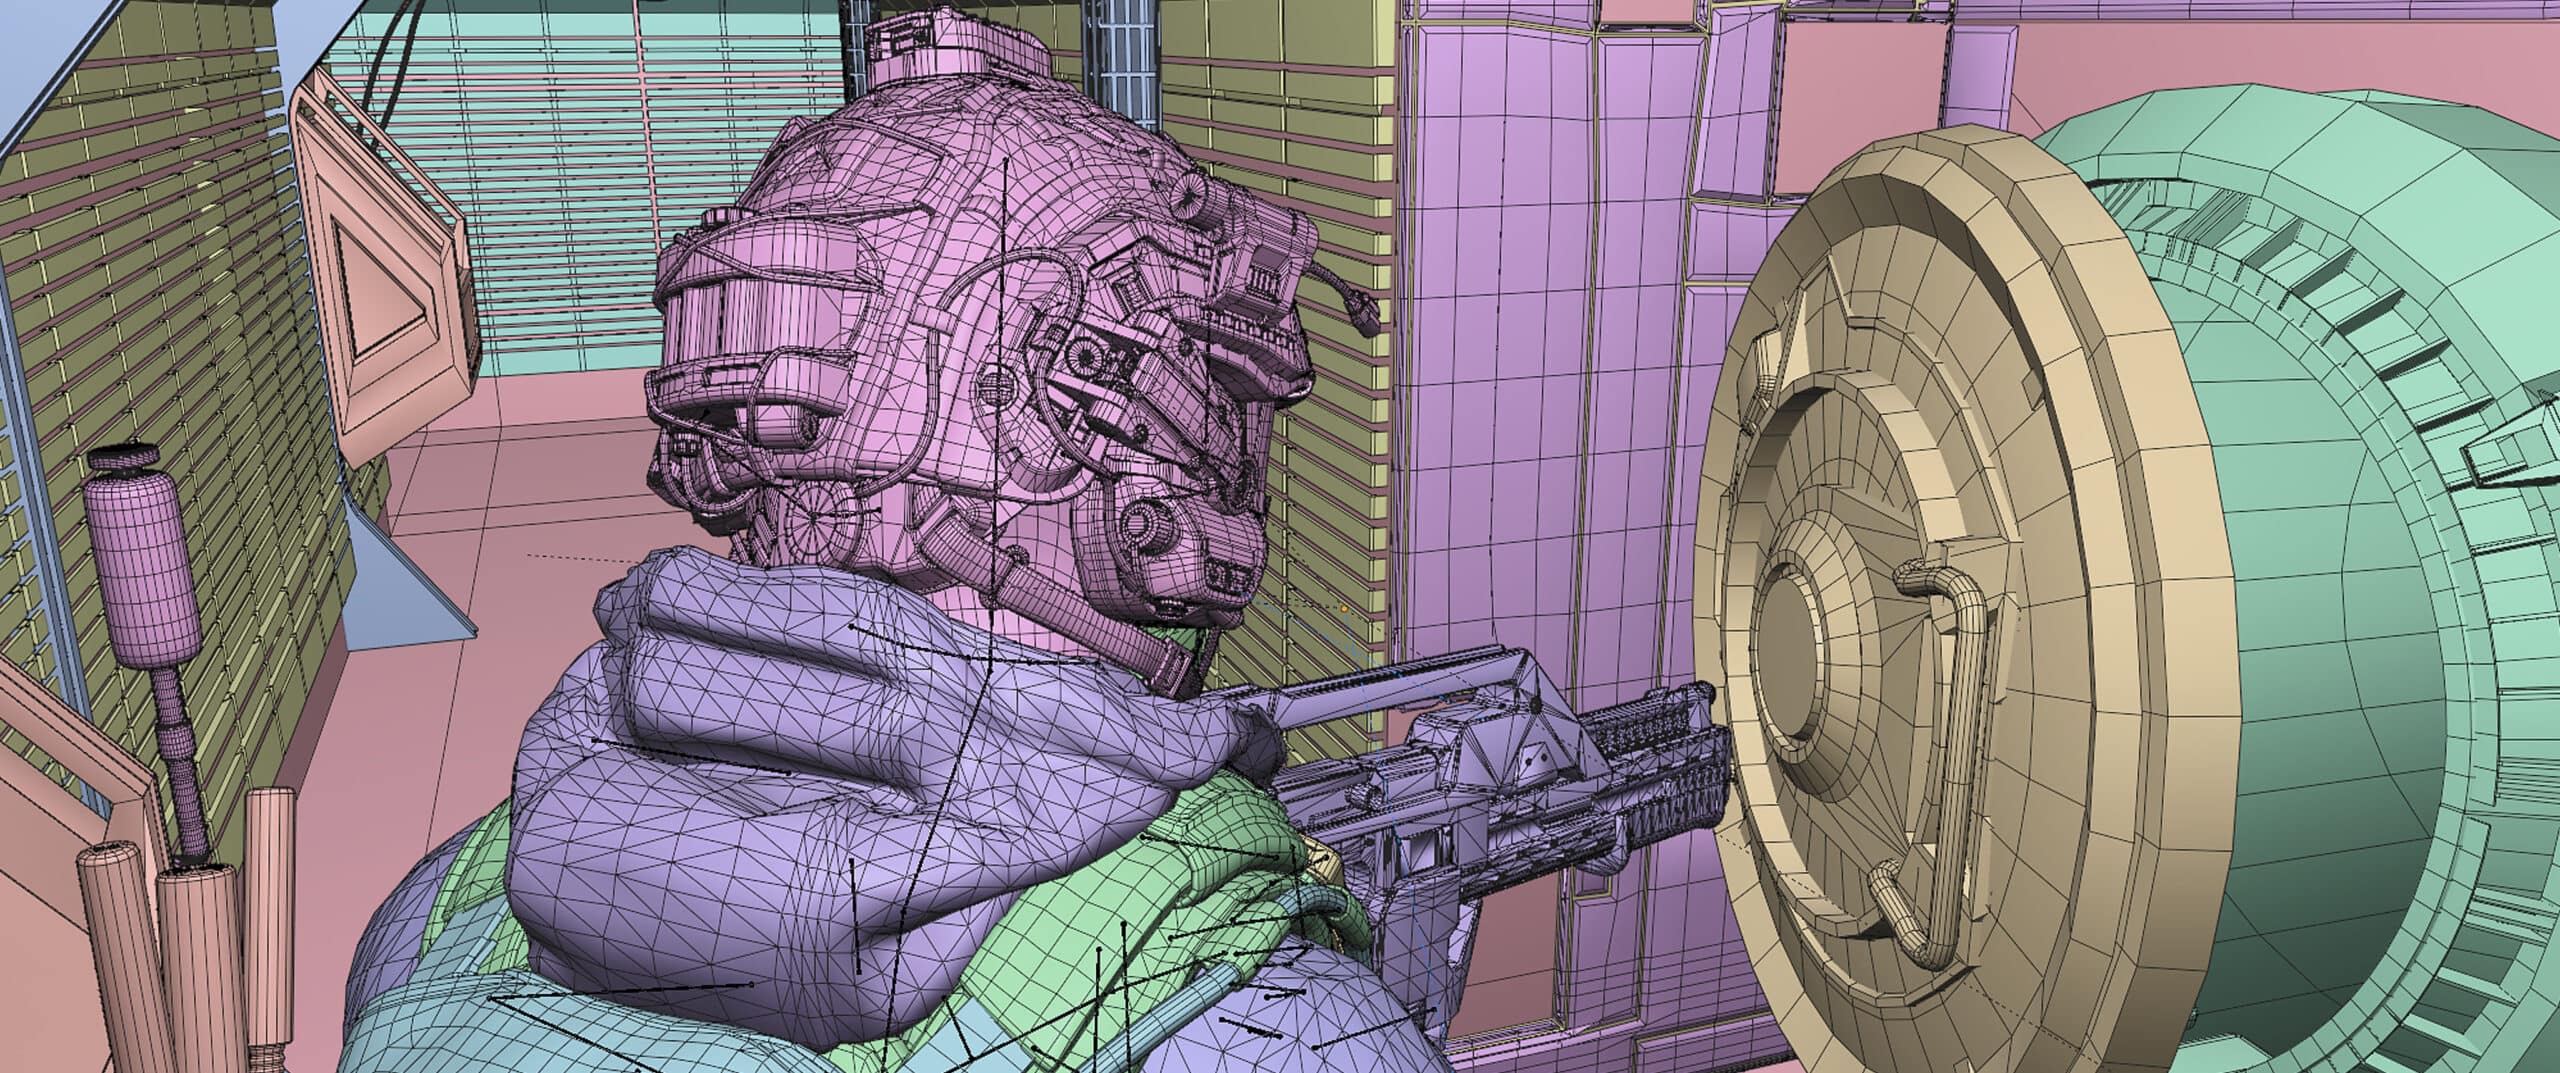
RECREATING ALIENS
Part 1 needed an establishing scene, something that placed the viewer inside the Alien universe before the project found its own direction. The APC sequence from Aliens was the obvious choice: a hard arrival, practical vehicle, hostile environment.
The main challenge was matching the original camera angle precisely. A few degrees of deviation or the wrong focal length and the reference falls apart. The scene was built in Blender using a combination of original modelling and kitbashed assets.
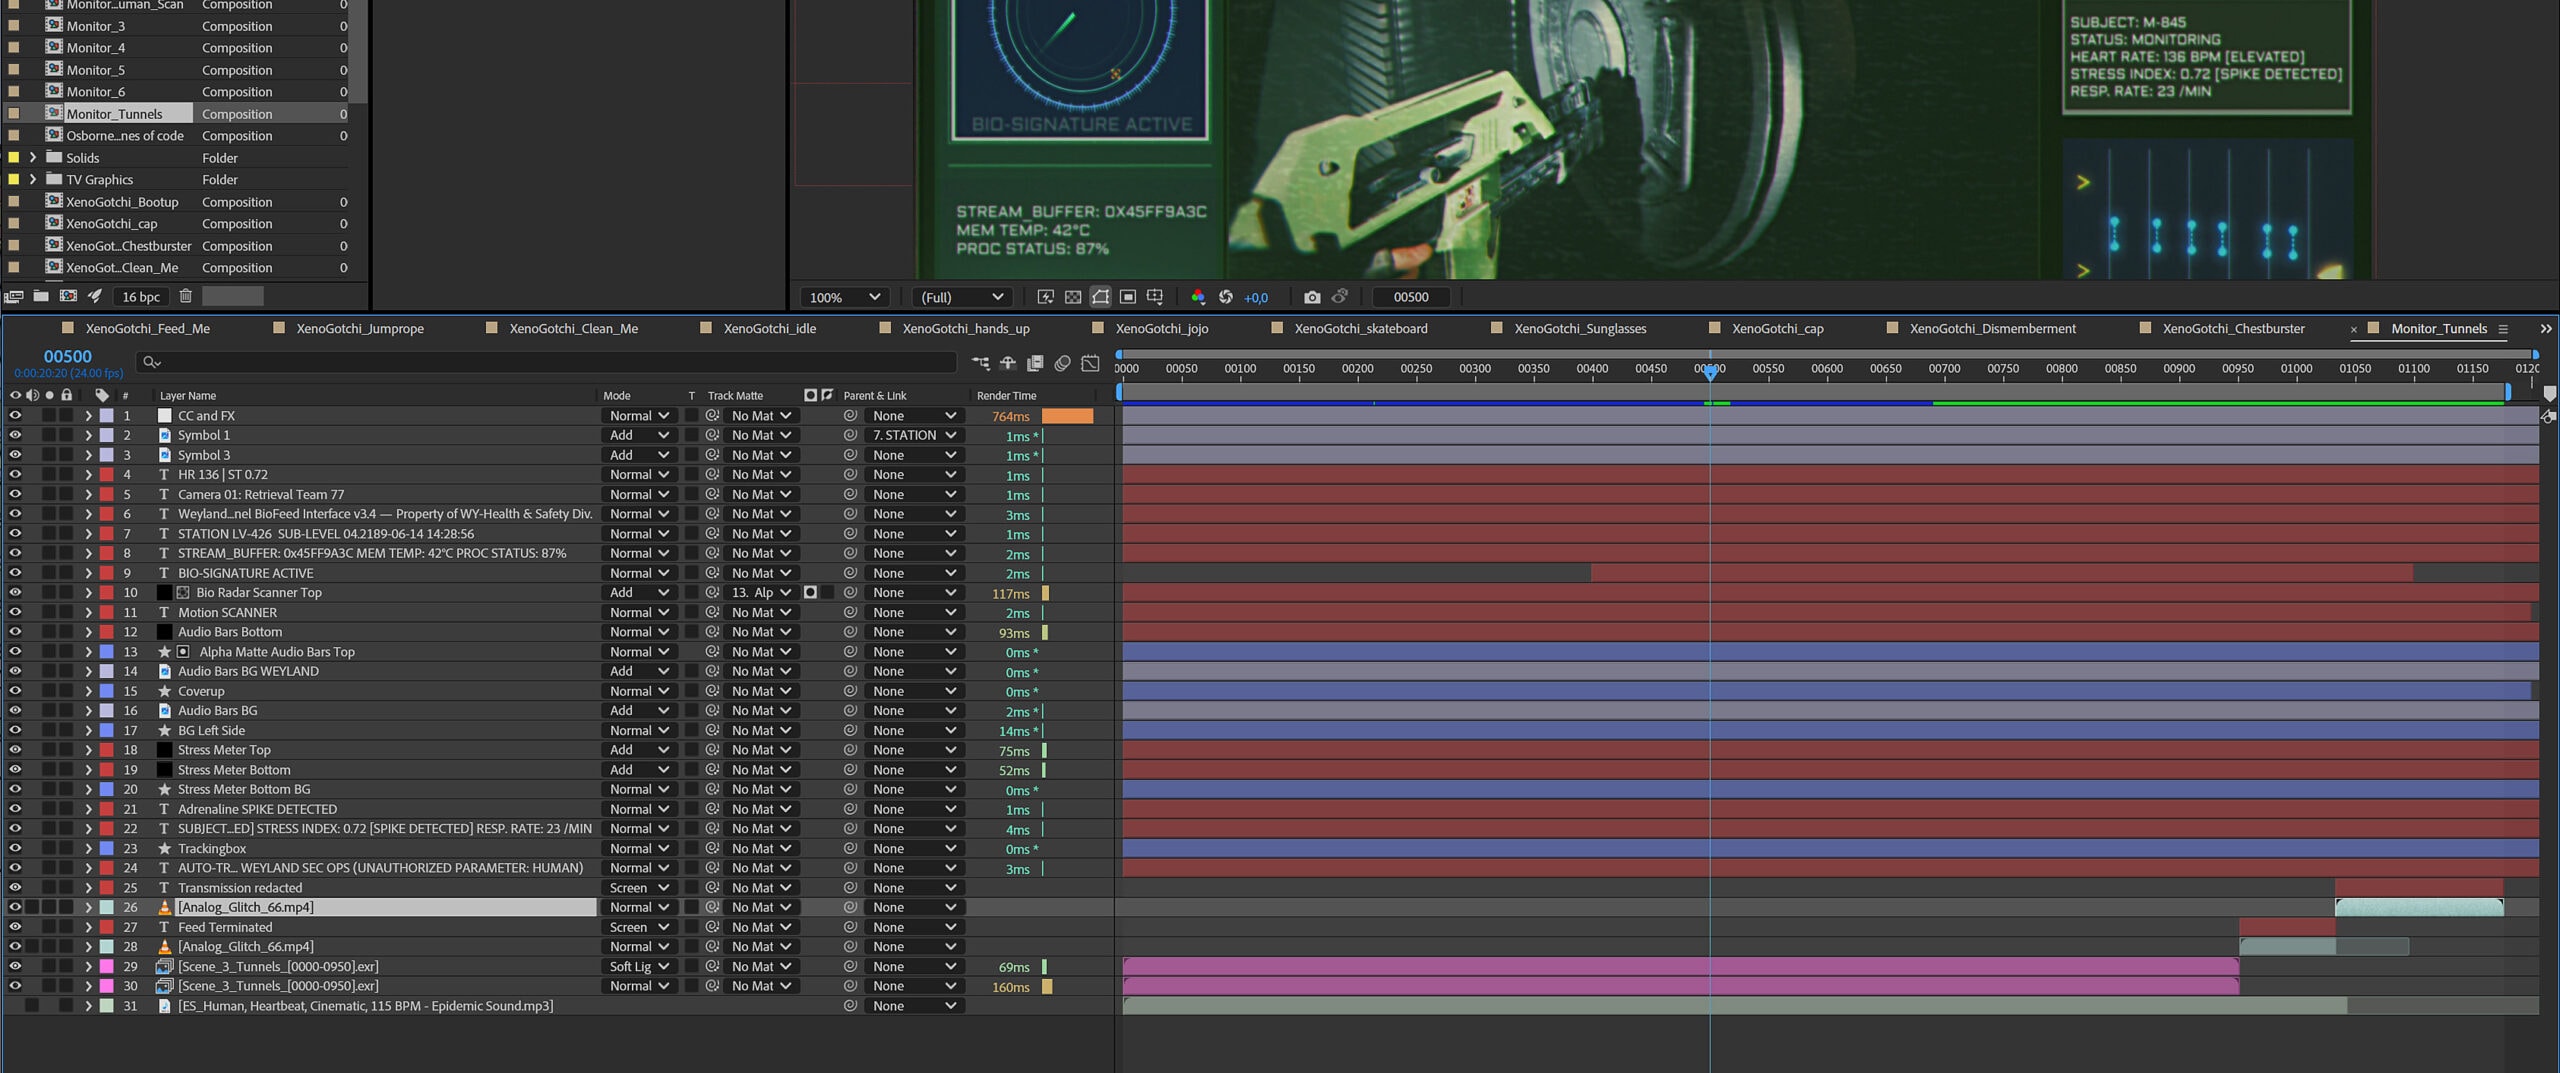
ANIMATING SCREENS
SURVEILLANCE MONITORS
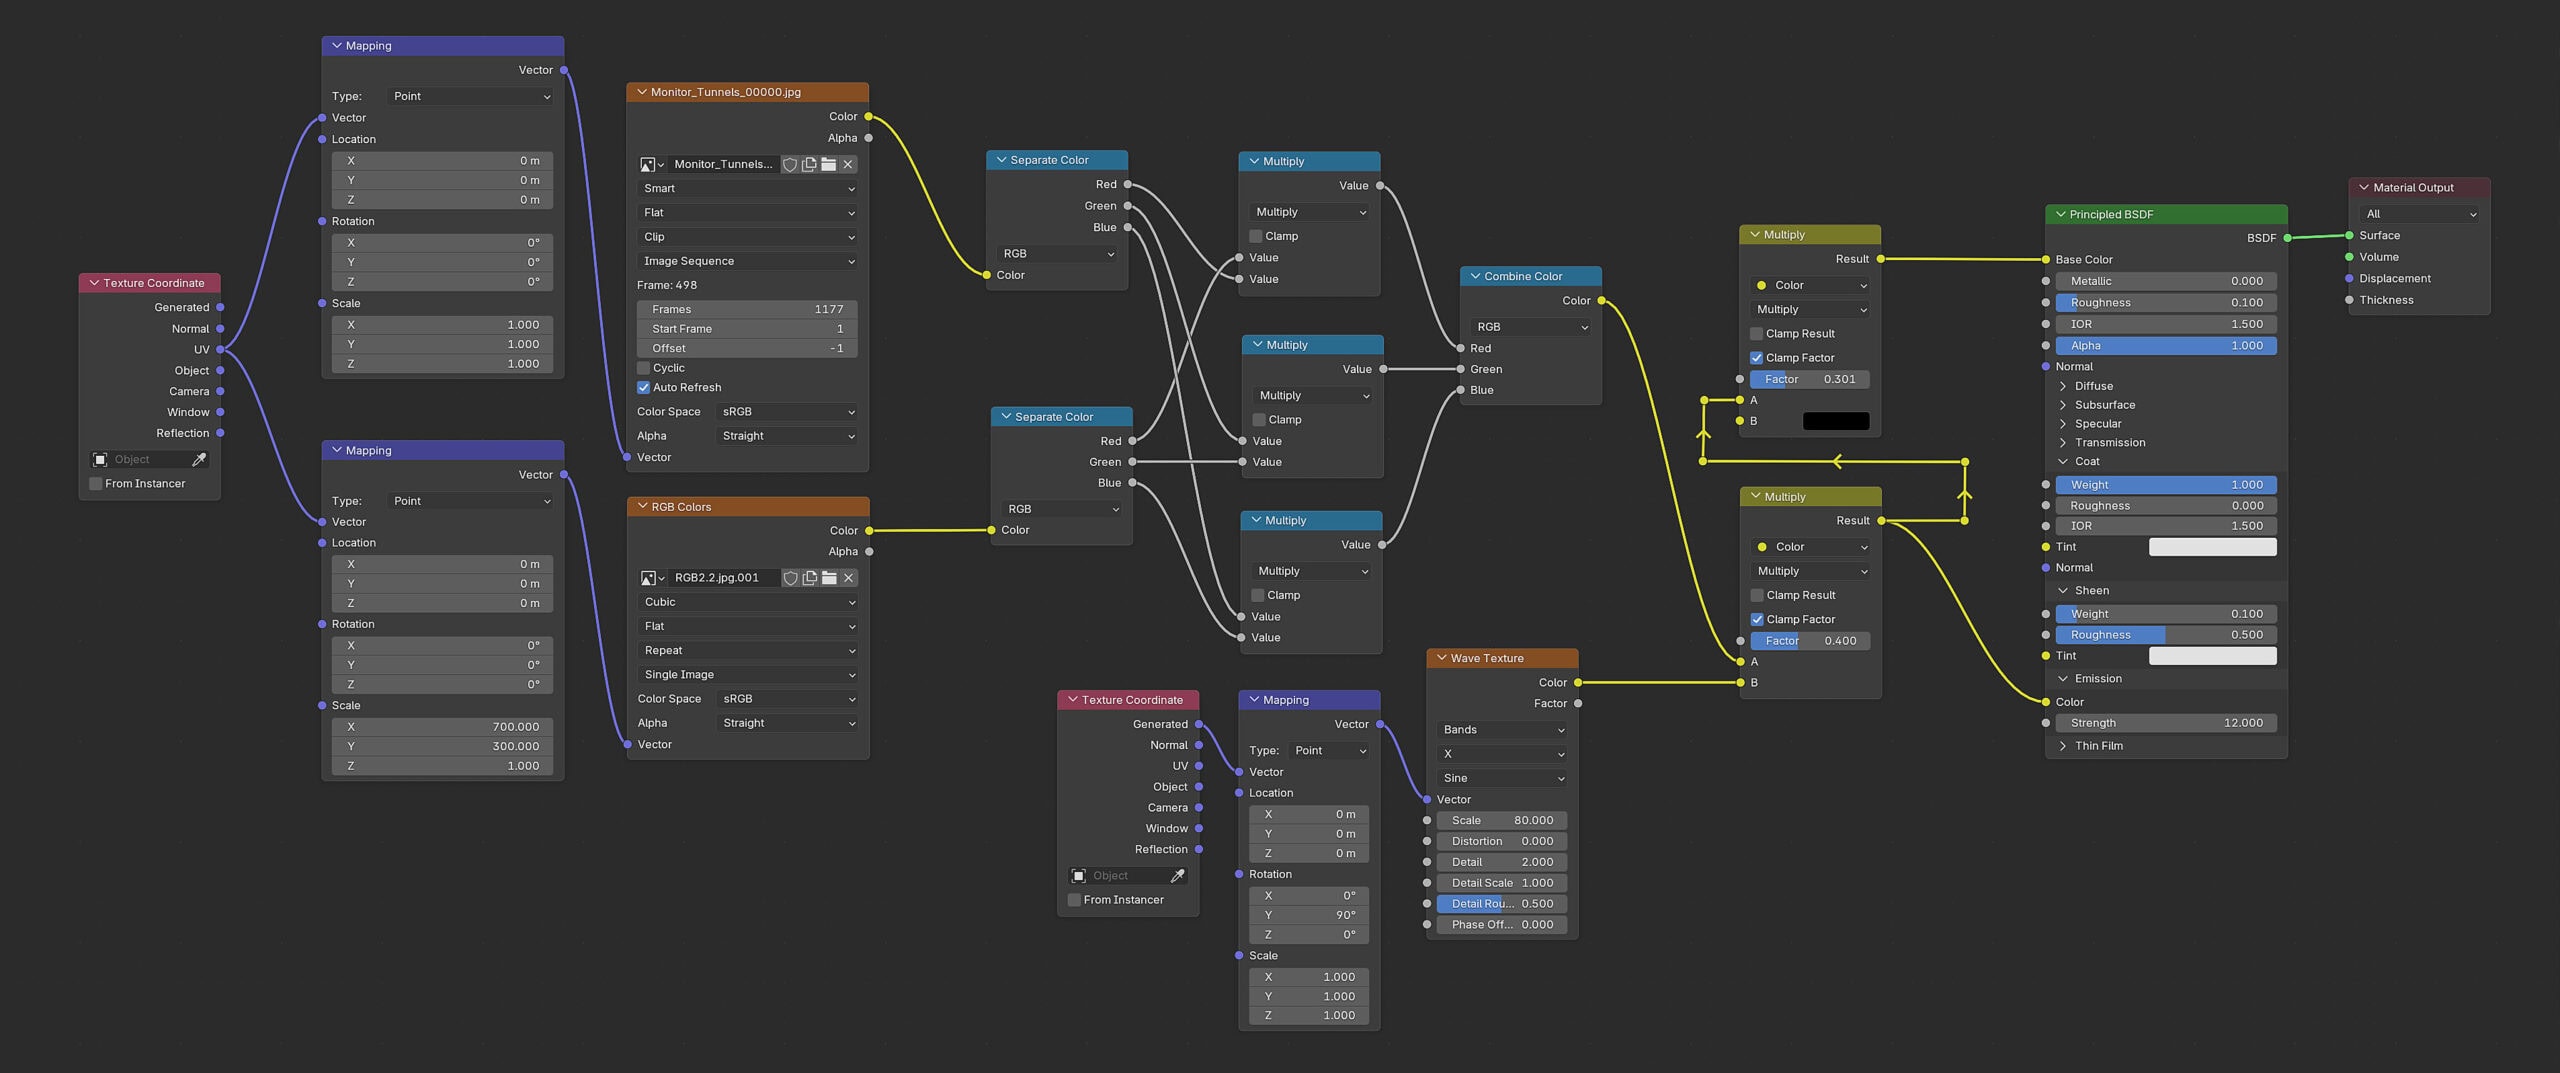
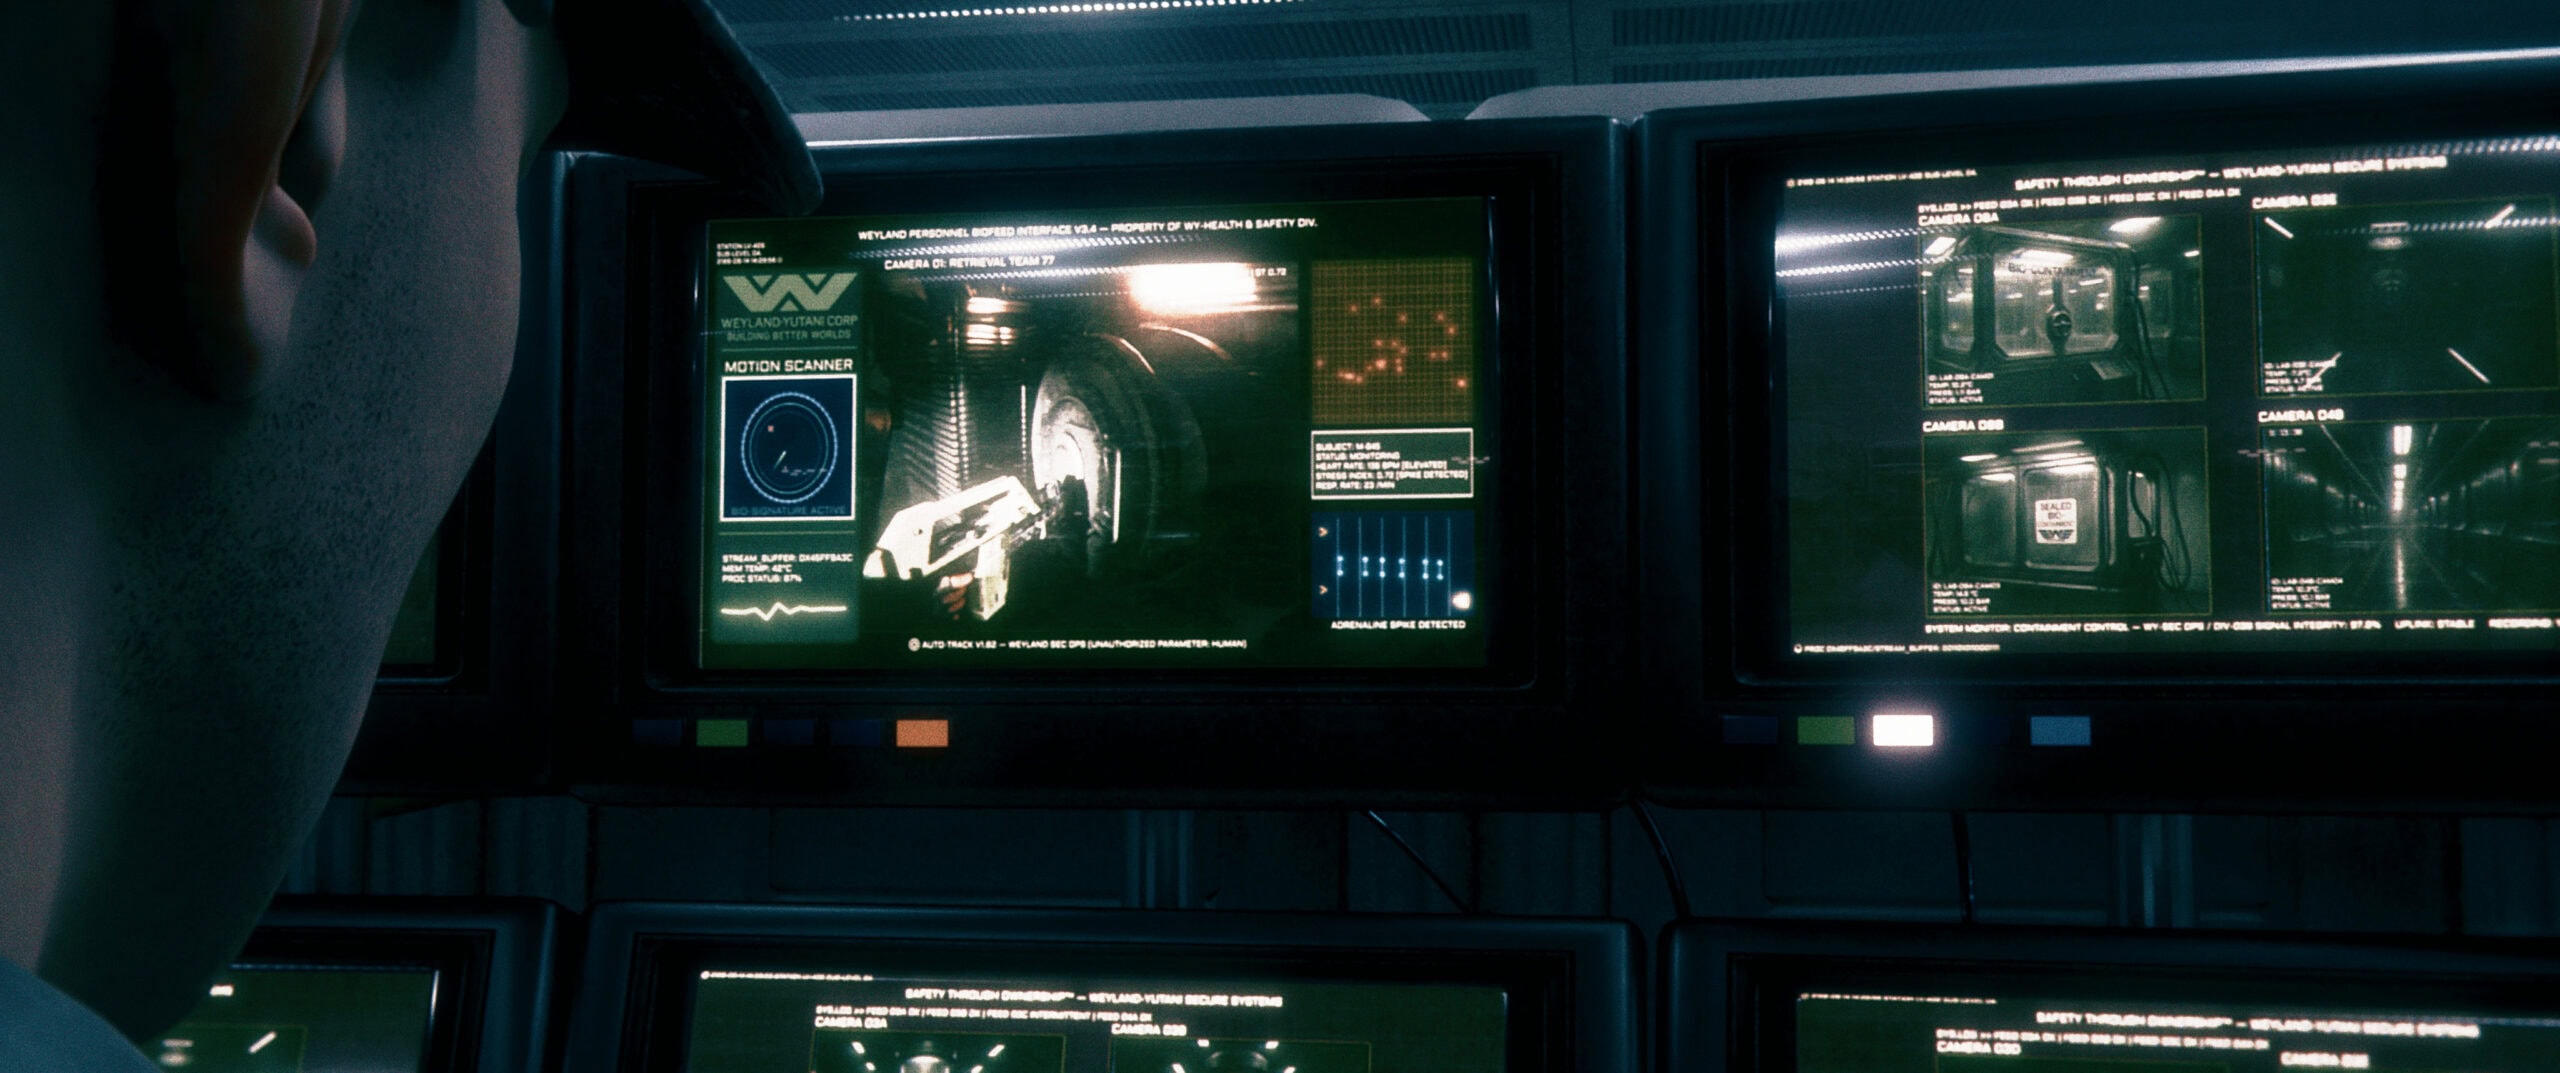
Not all screens needed to say something. Background monitors were built from AI-generated stills run through a VHS filter and glitch pass, enough to read as active without drawing attention. The main surveillance interface was different. That screen needed to feel like it was actually capturing something.
The solution was to build the scene first, render it, then feed the output back into Blender as a texture on the monitor geometry. A custom shader splits the image into RGB channels and applies a wave distortion to simulate CRT phosphor rows. The screen in the final render is a real-time view of a real scene with added widgets and datalayers.
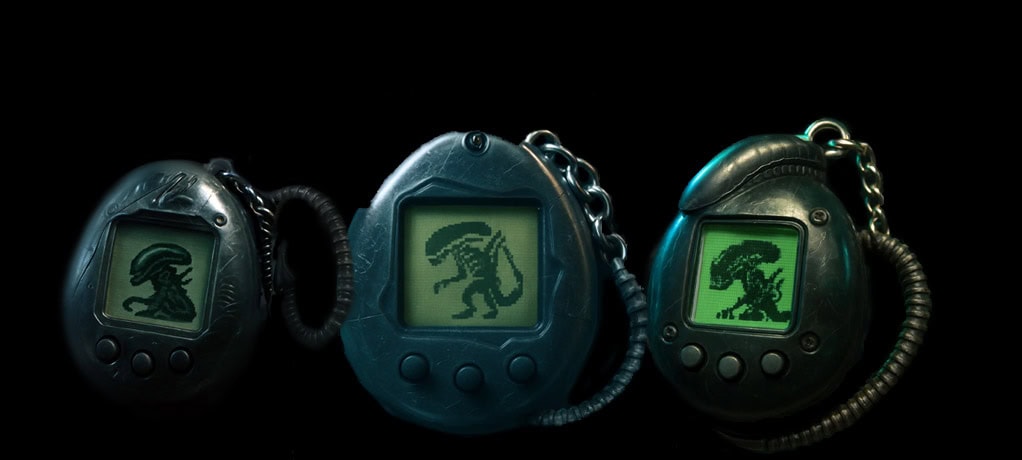
XENOGOTCHI SCREENS
The XenoGotchi device needed over 20 unique screen animations, covering minigames, idle states, and moments that mirror events in the film. Modelling or drawing everything from scratch would have taken weeks.
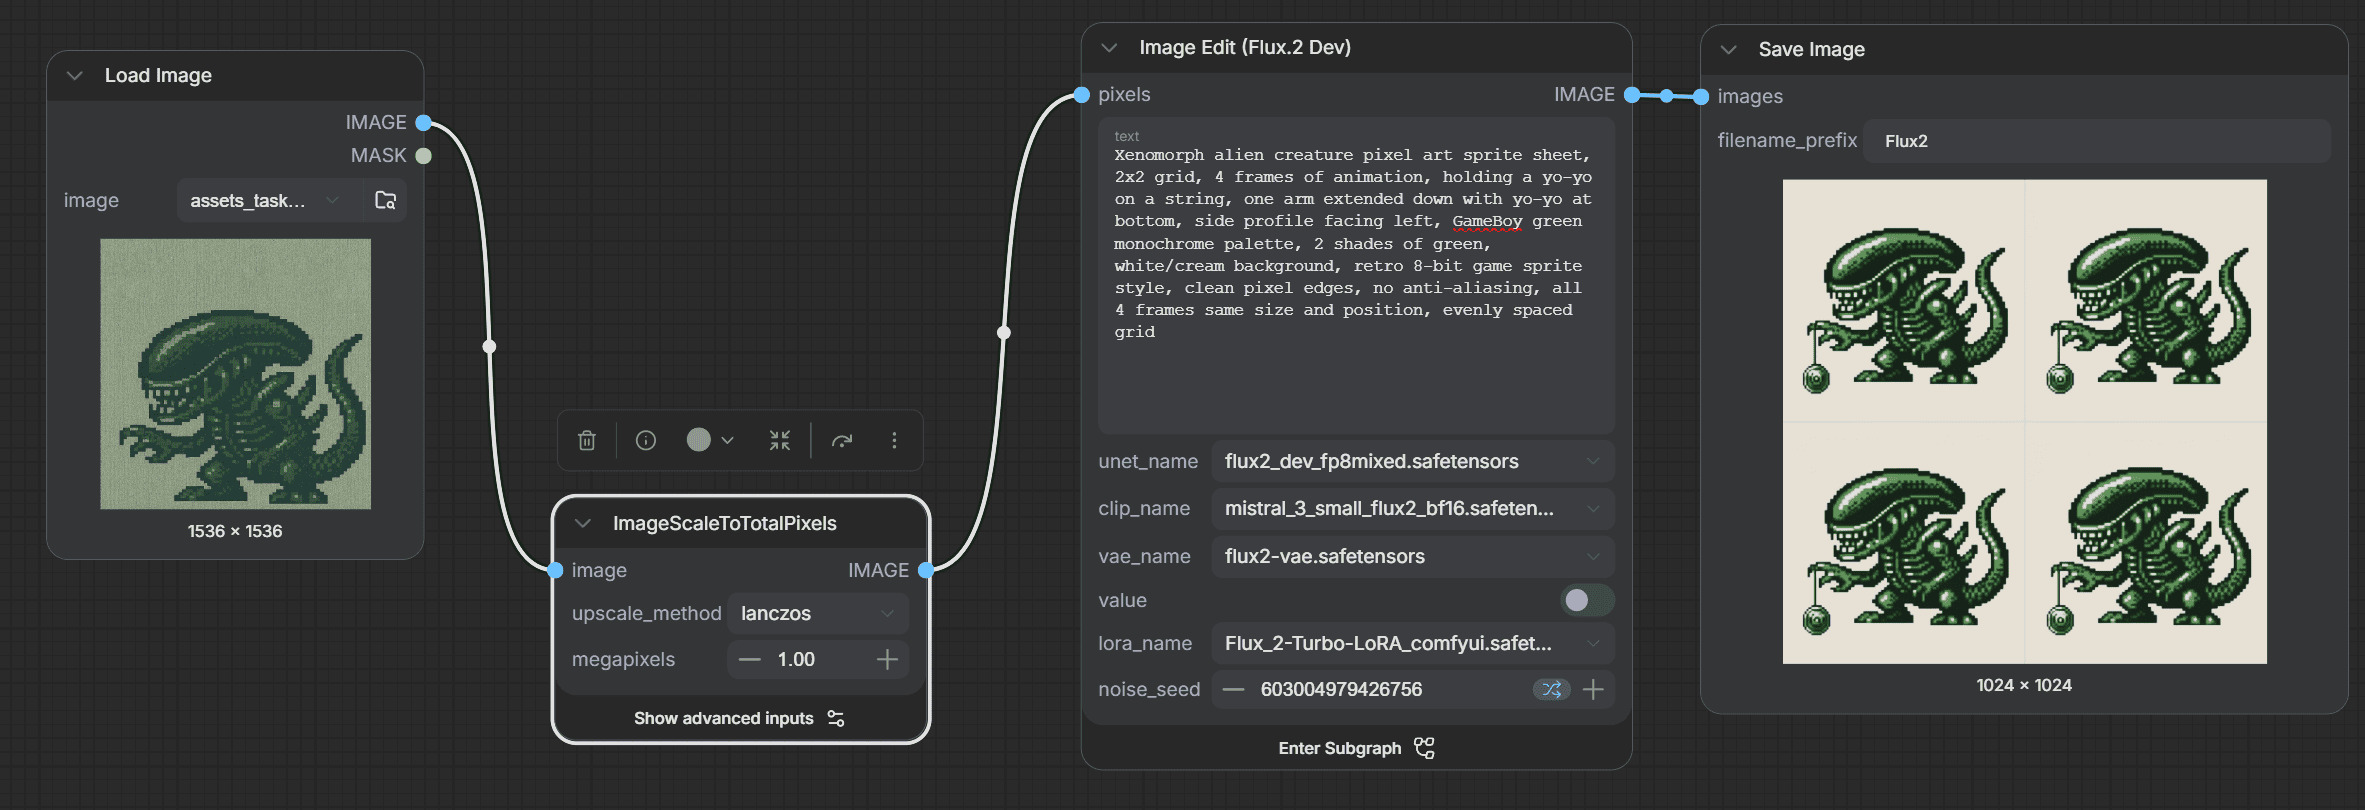
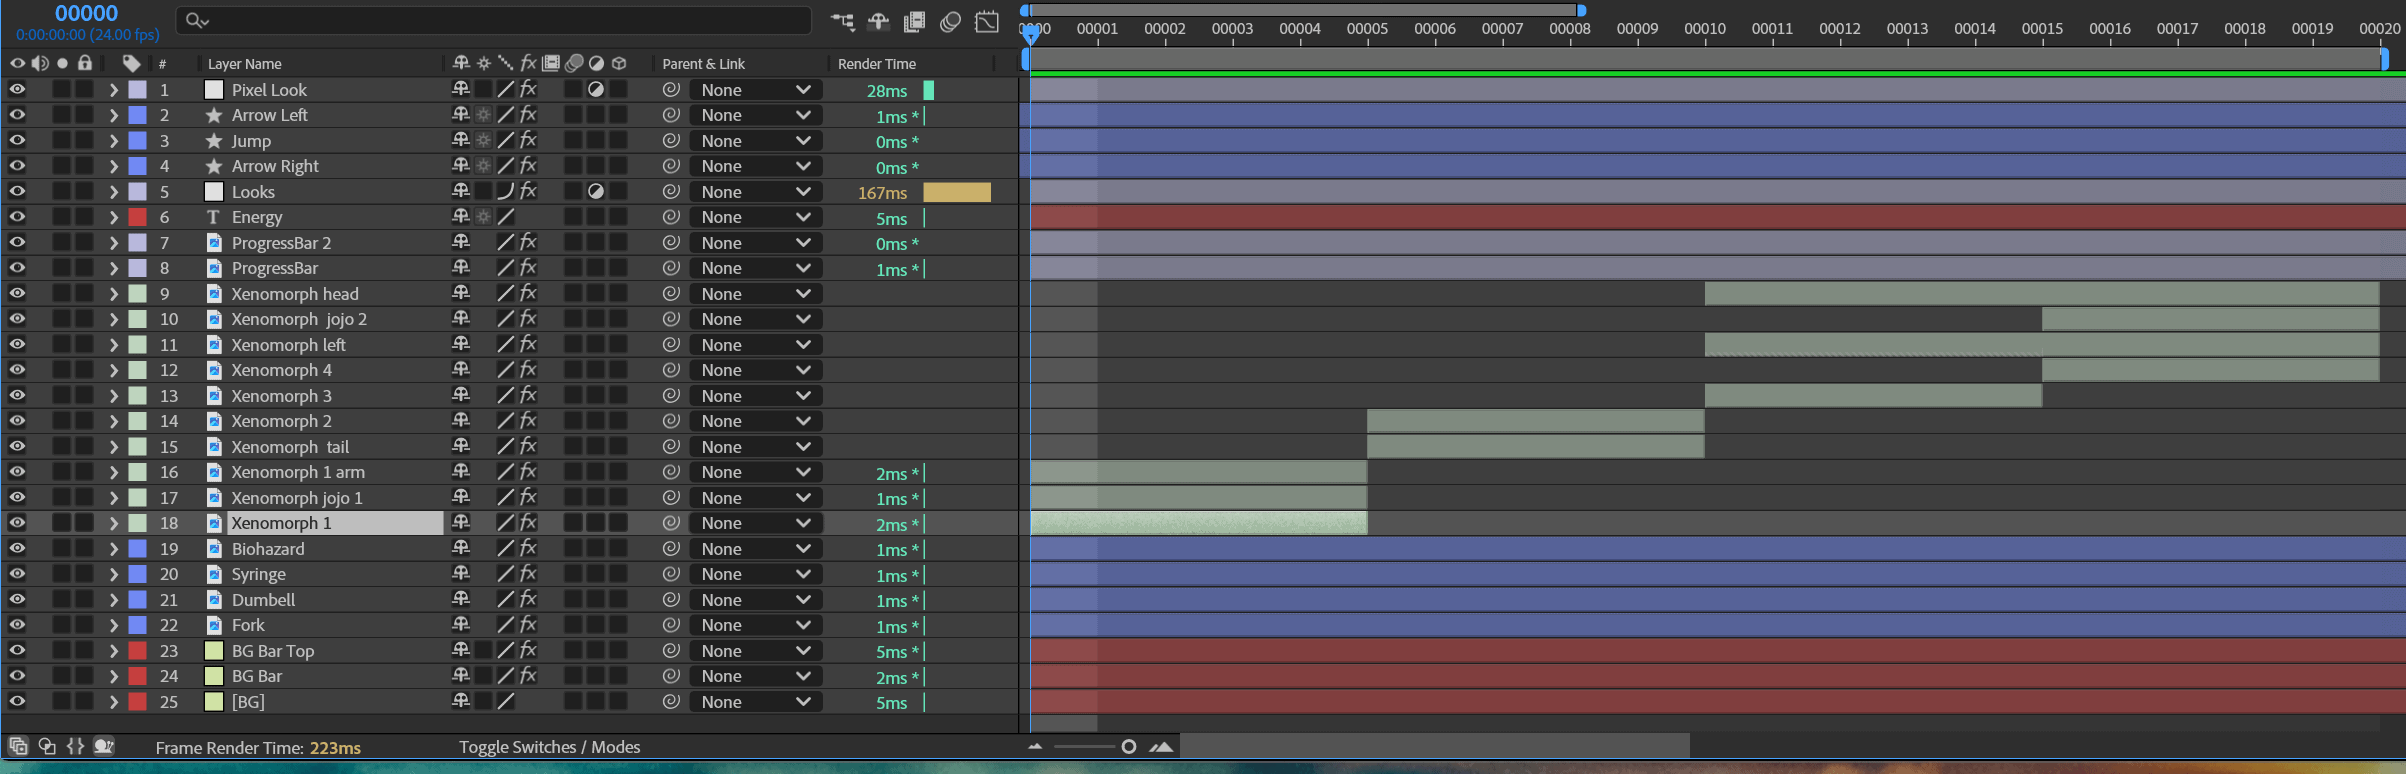
The solution was generative AI as a production tool. A base xenomorph sprite was fed into Flux 2 in ComfyUI with a detailed prompt describing pose, palette, and grid layout. The output came back as a spritesheet, which was then masked and animated in After Effects. Every animation still required hands-on decisions about timing, character and how each screen served the scene it appeared in.
WORLDBUILDING
NOSTROMO TUNNELS
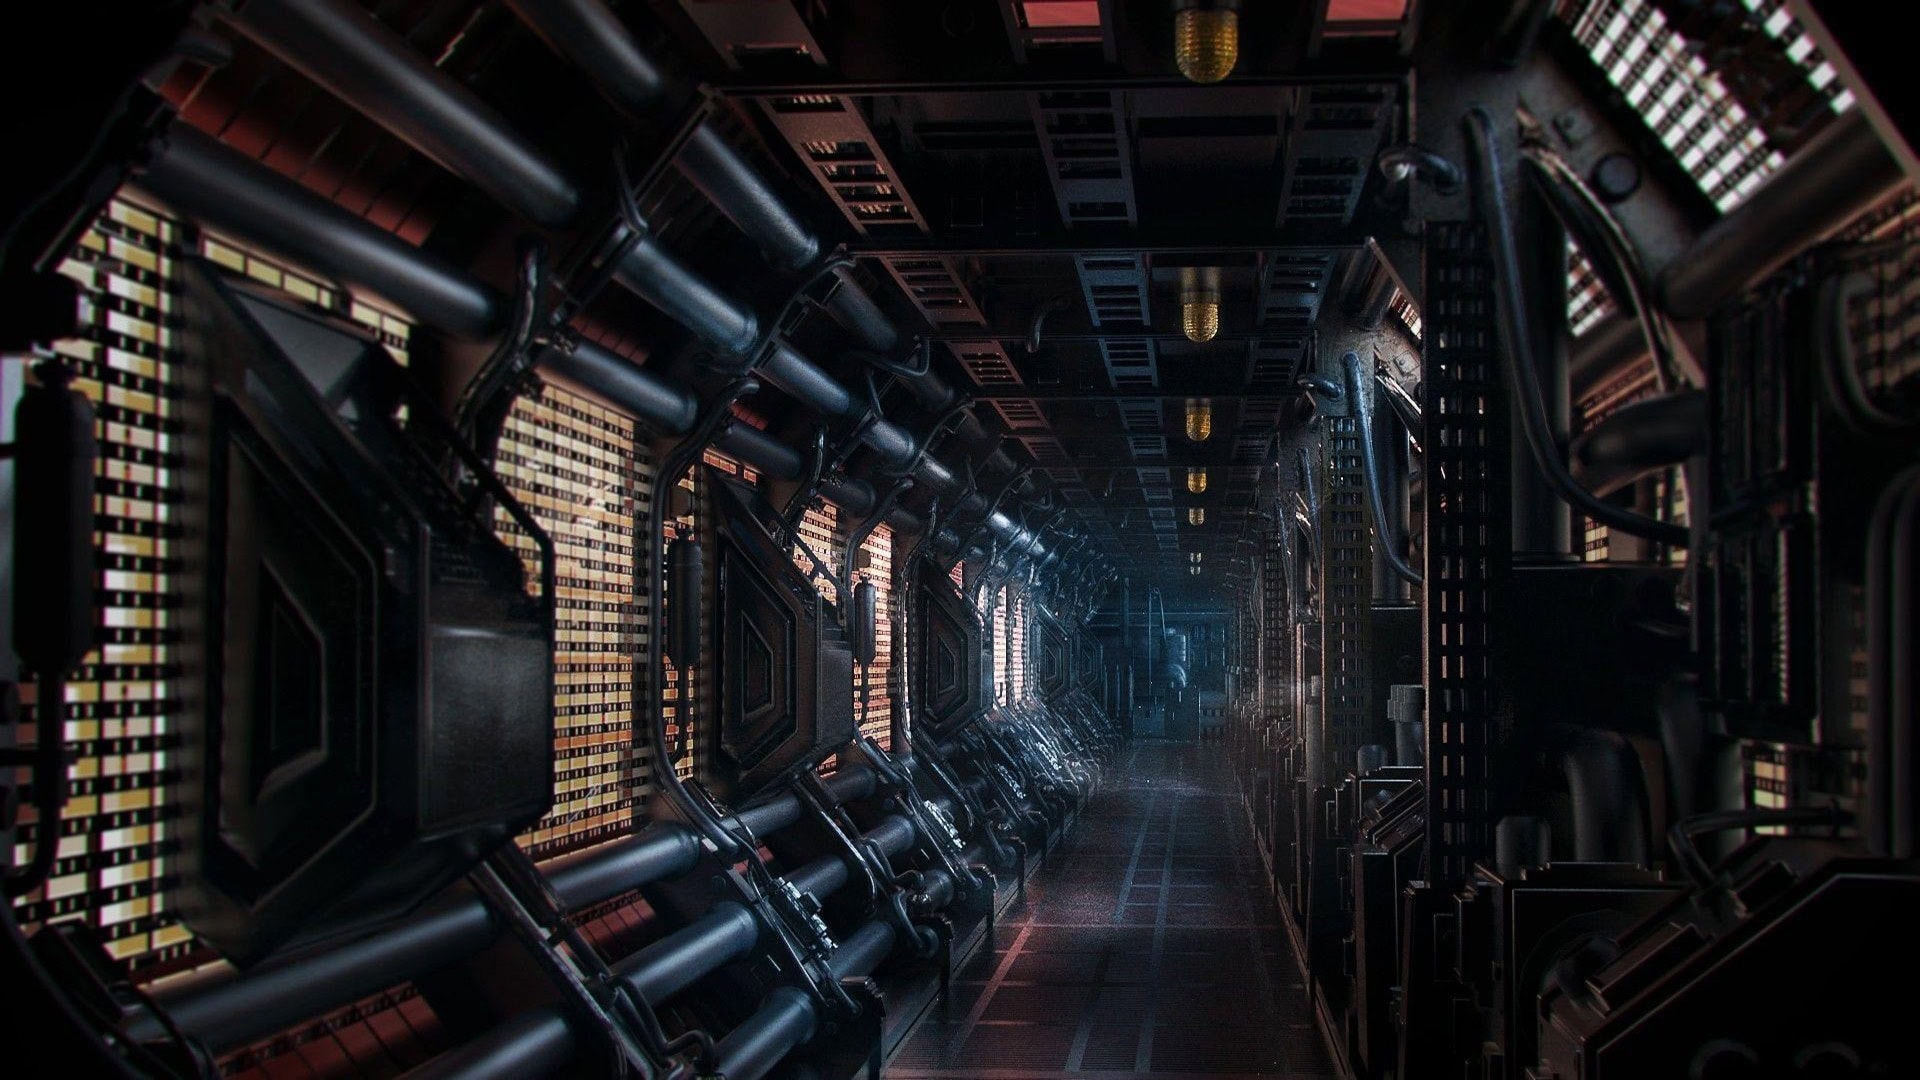
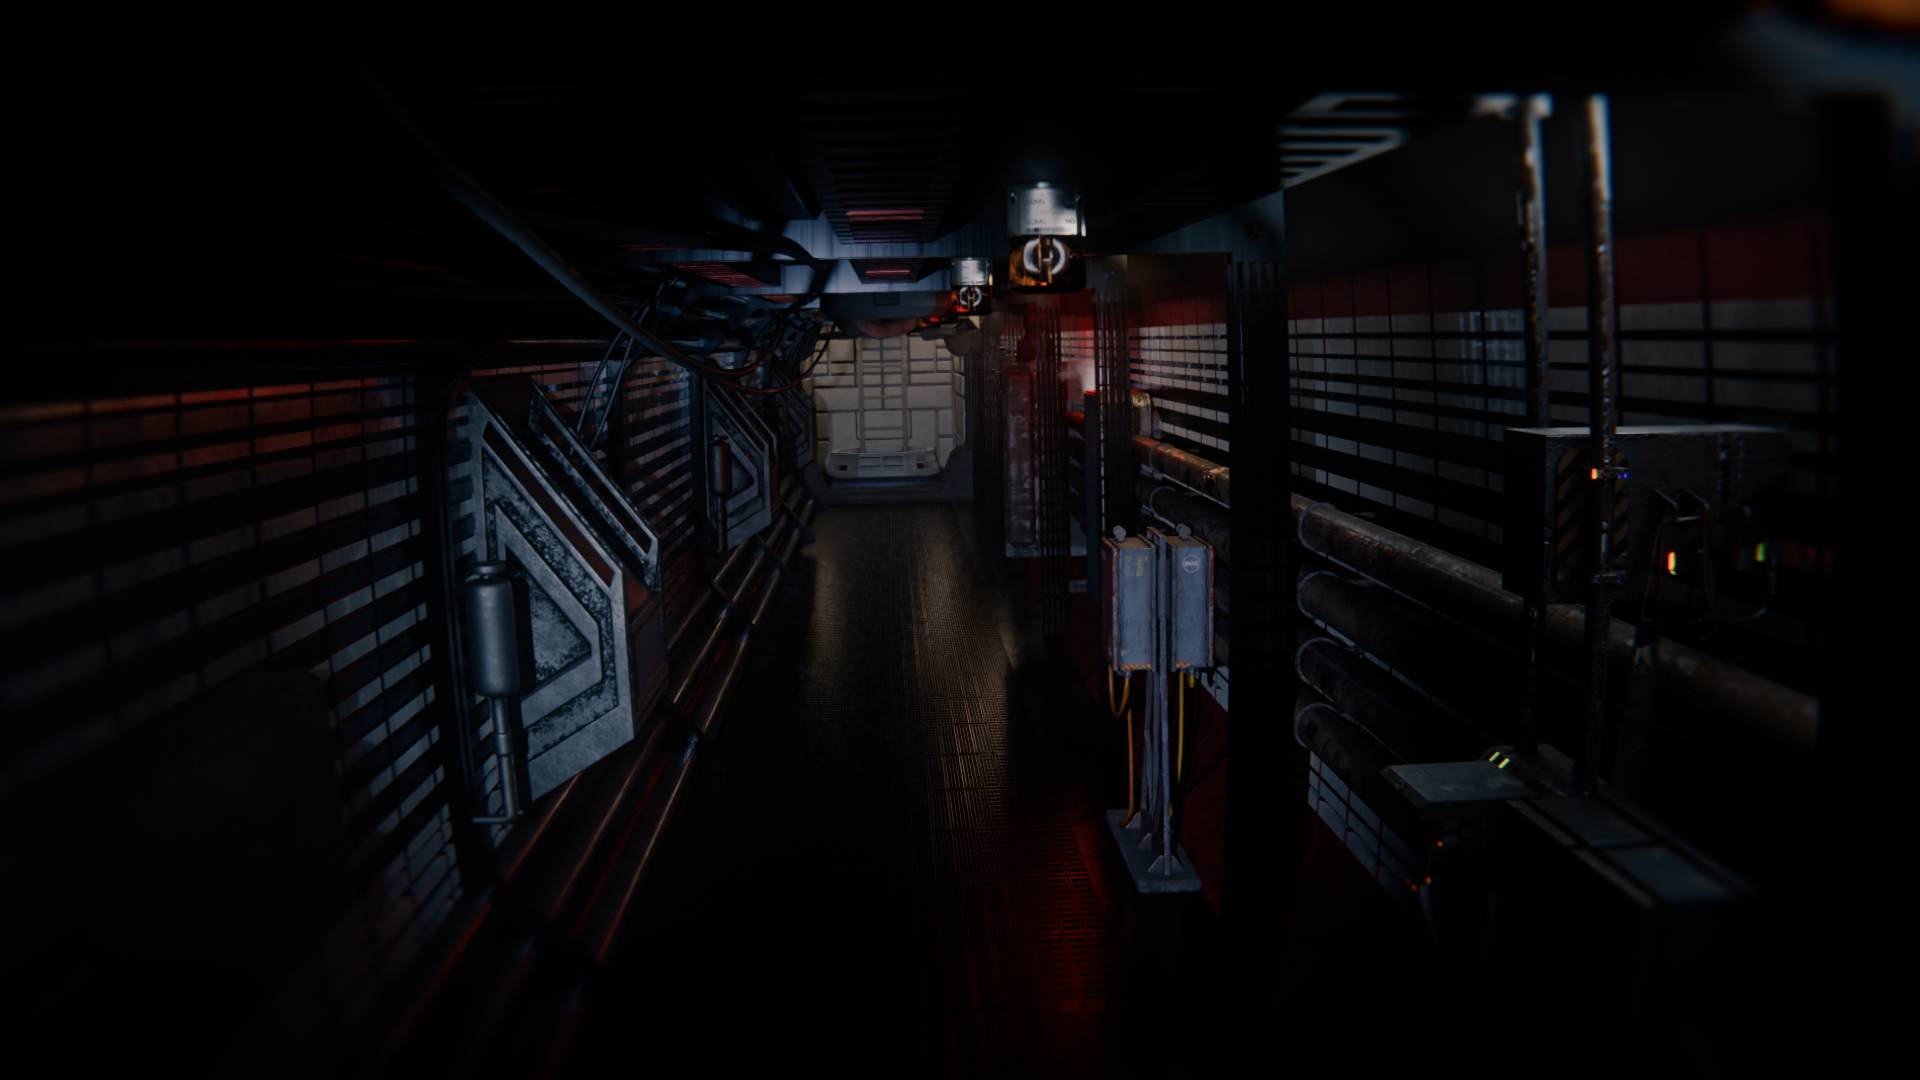
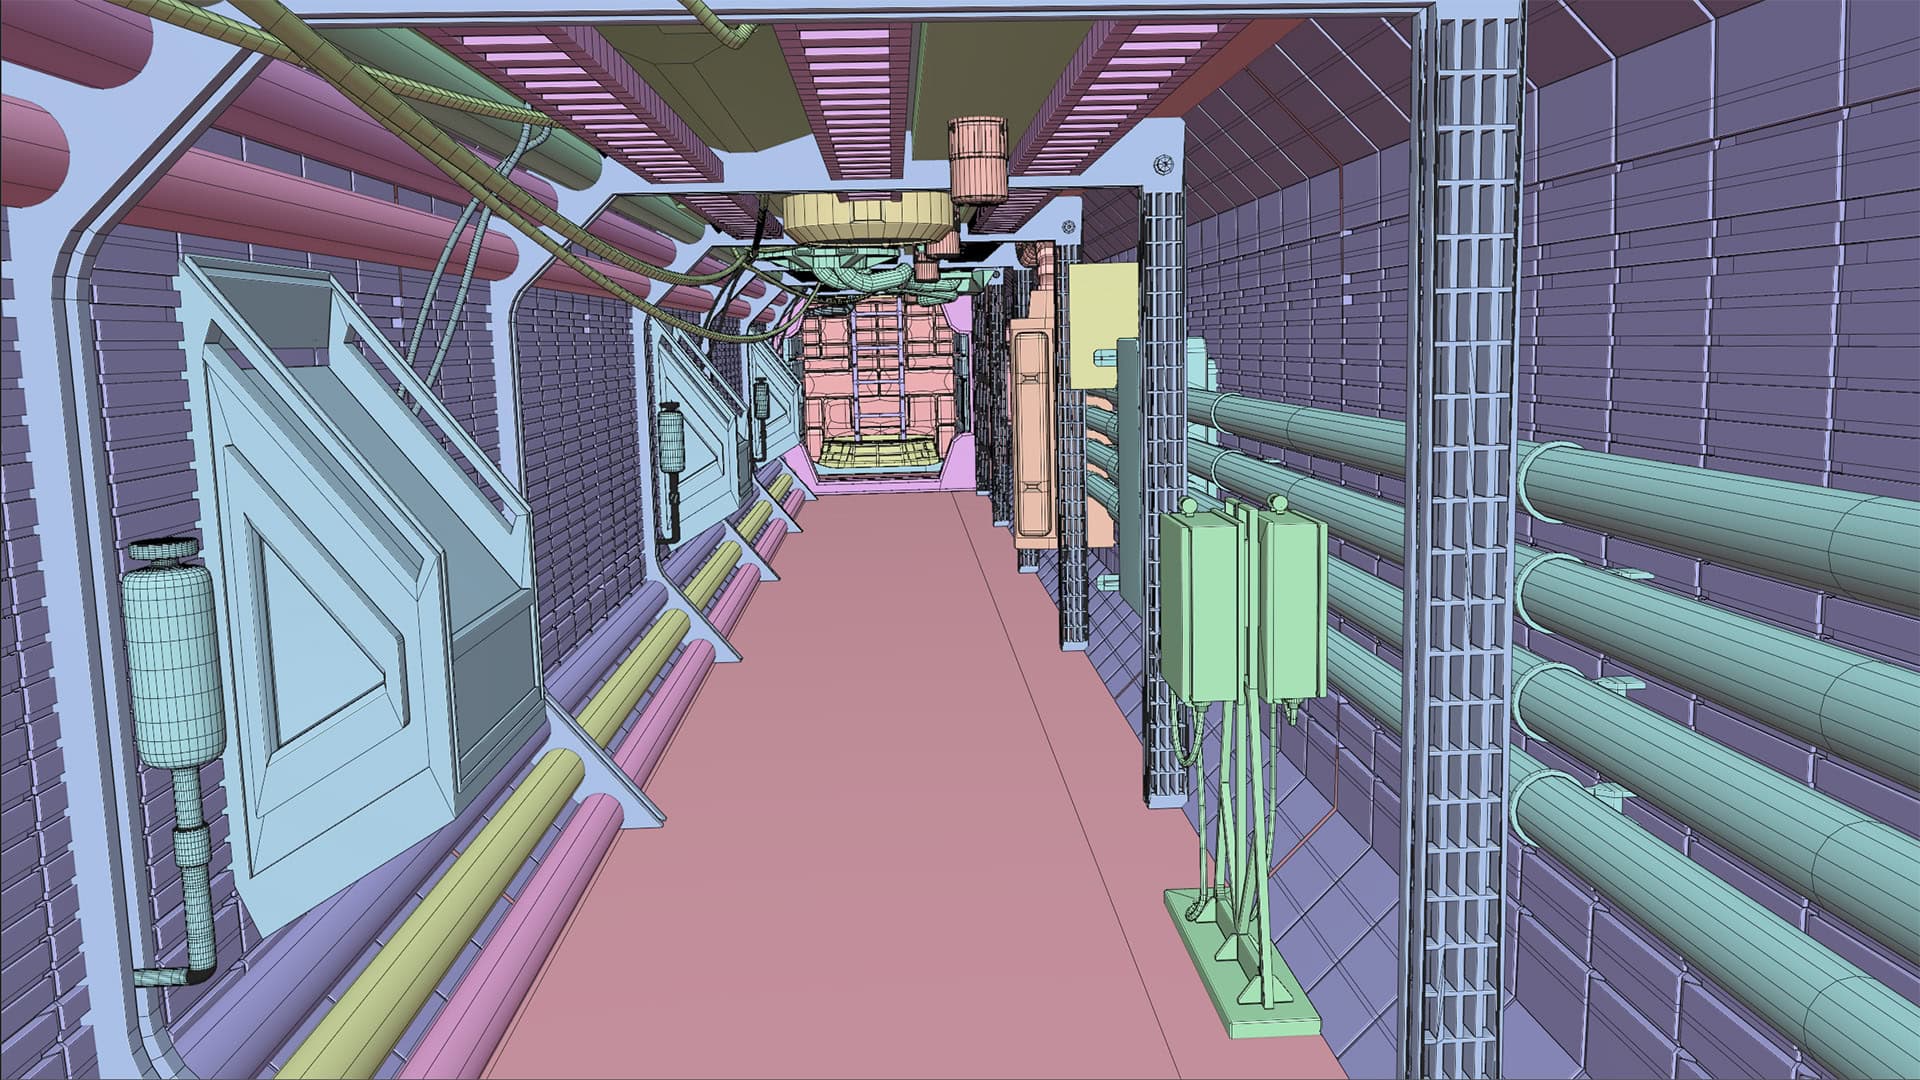
The Nostromo’s corridors are among the most referenced environments in science fiction, designed by Ron Cobb to feel industrial and lived-in. Recreating that environment meant studying the original carefully and building it from scratch through kitbashing, combining assets from Big Medium Small, Kitbash 3D and Sketchfab with original modelling.
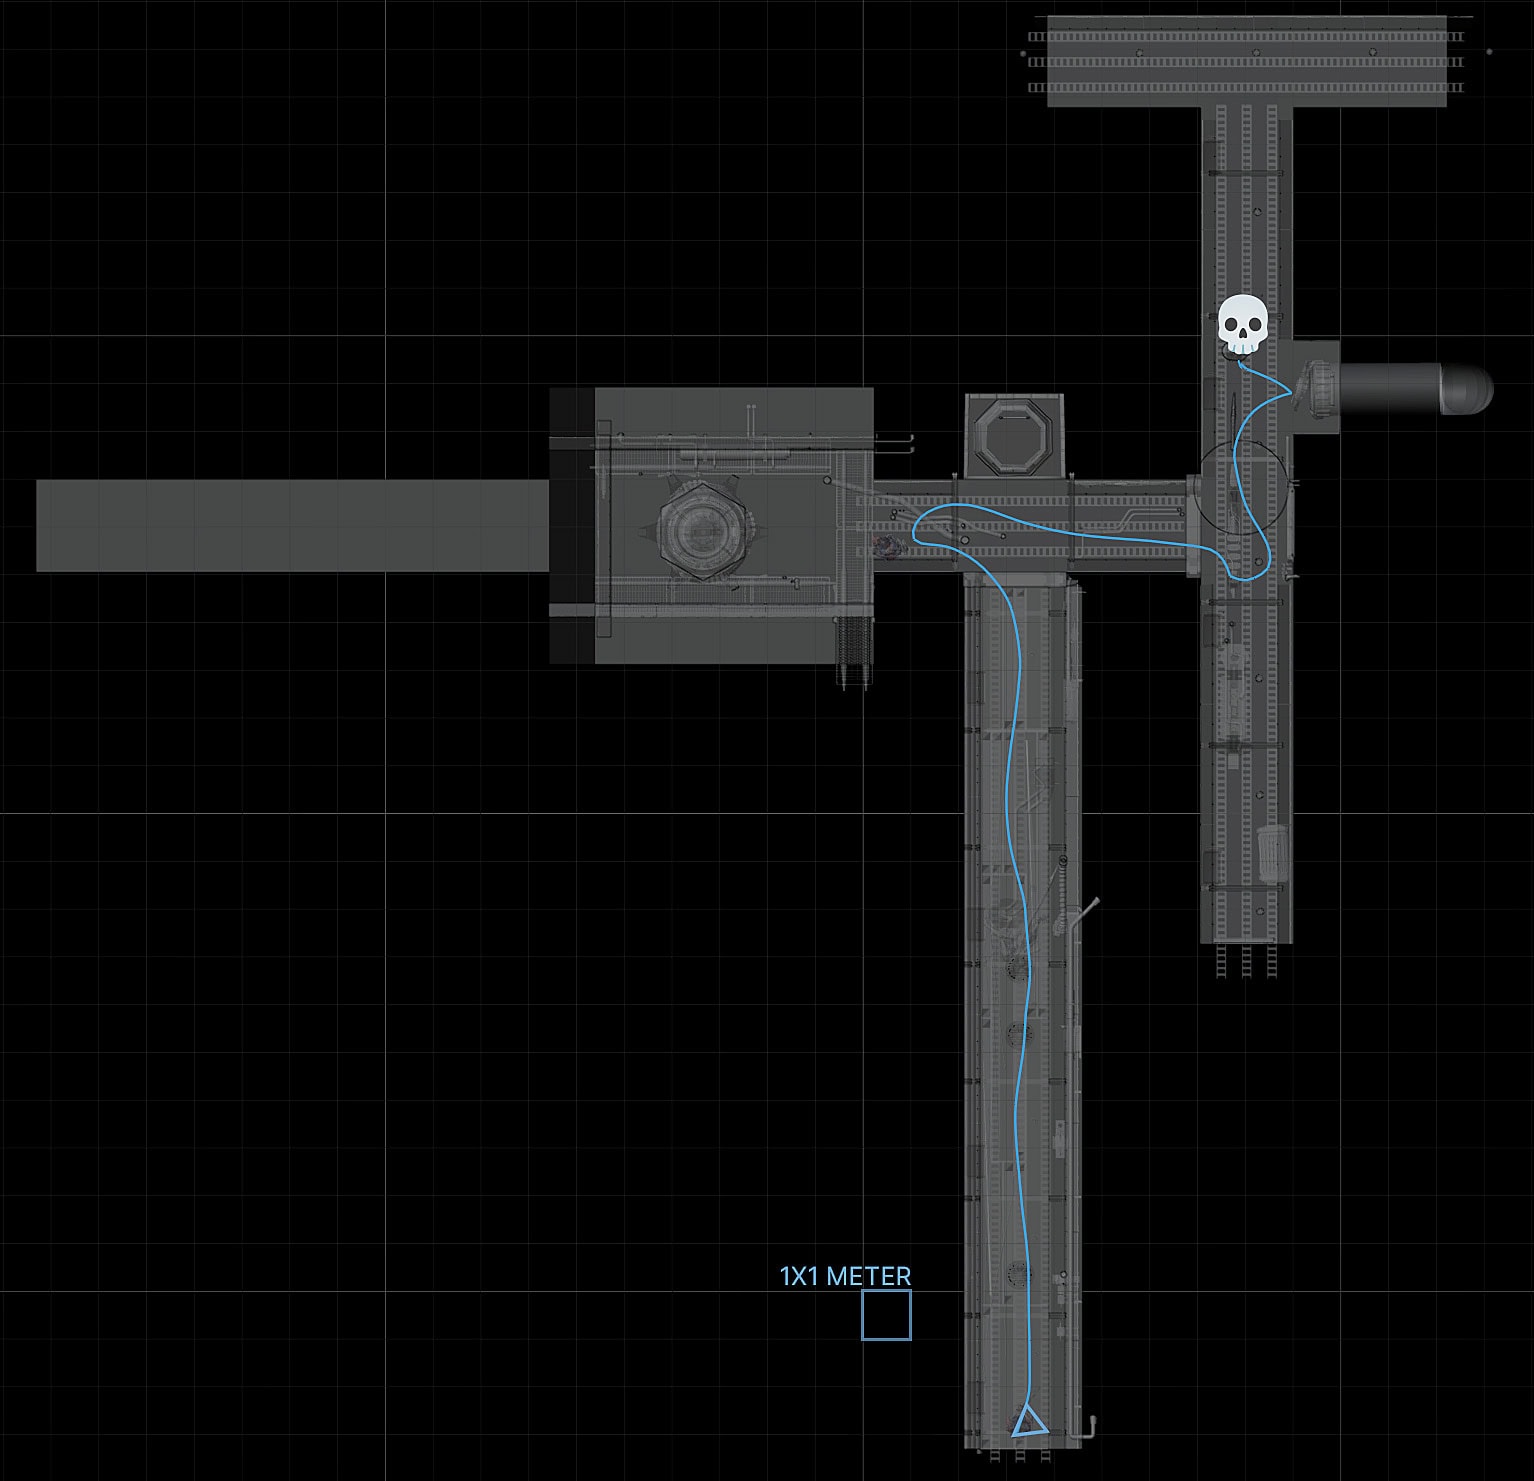
The camera move through the tunnels was recorded using Blender’s walk mode, physically moving through the space in real time to capture the weight and hesitation of someone actually navigating it. A marine mesh was parented to the camera to sell the POV, with an independent shoulder lamp providing the primary light source. Moving the lamp separately meant full control over where the viewer’s eye goes at any moment.
FROM CONCEPT TO SCENE
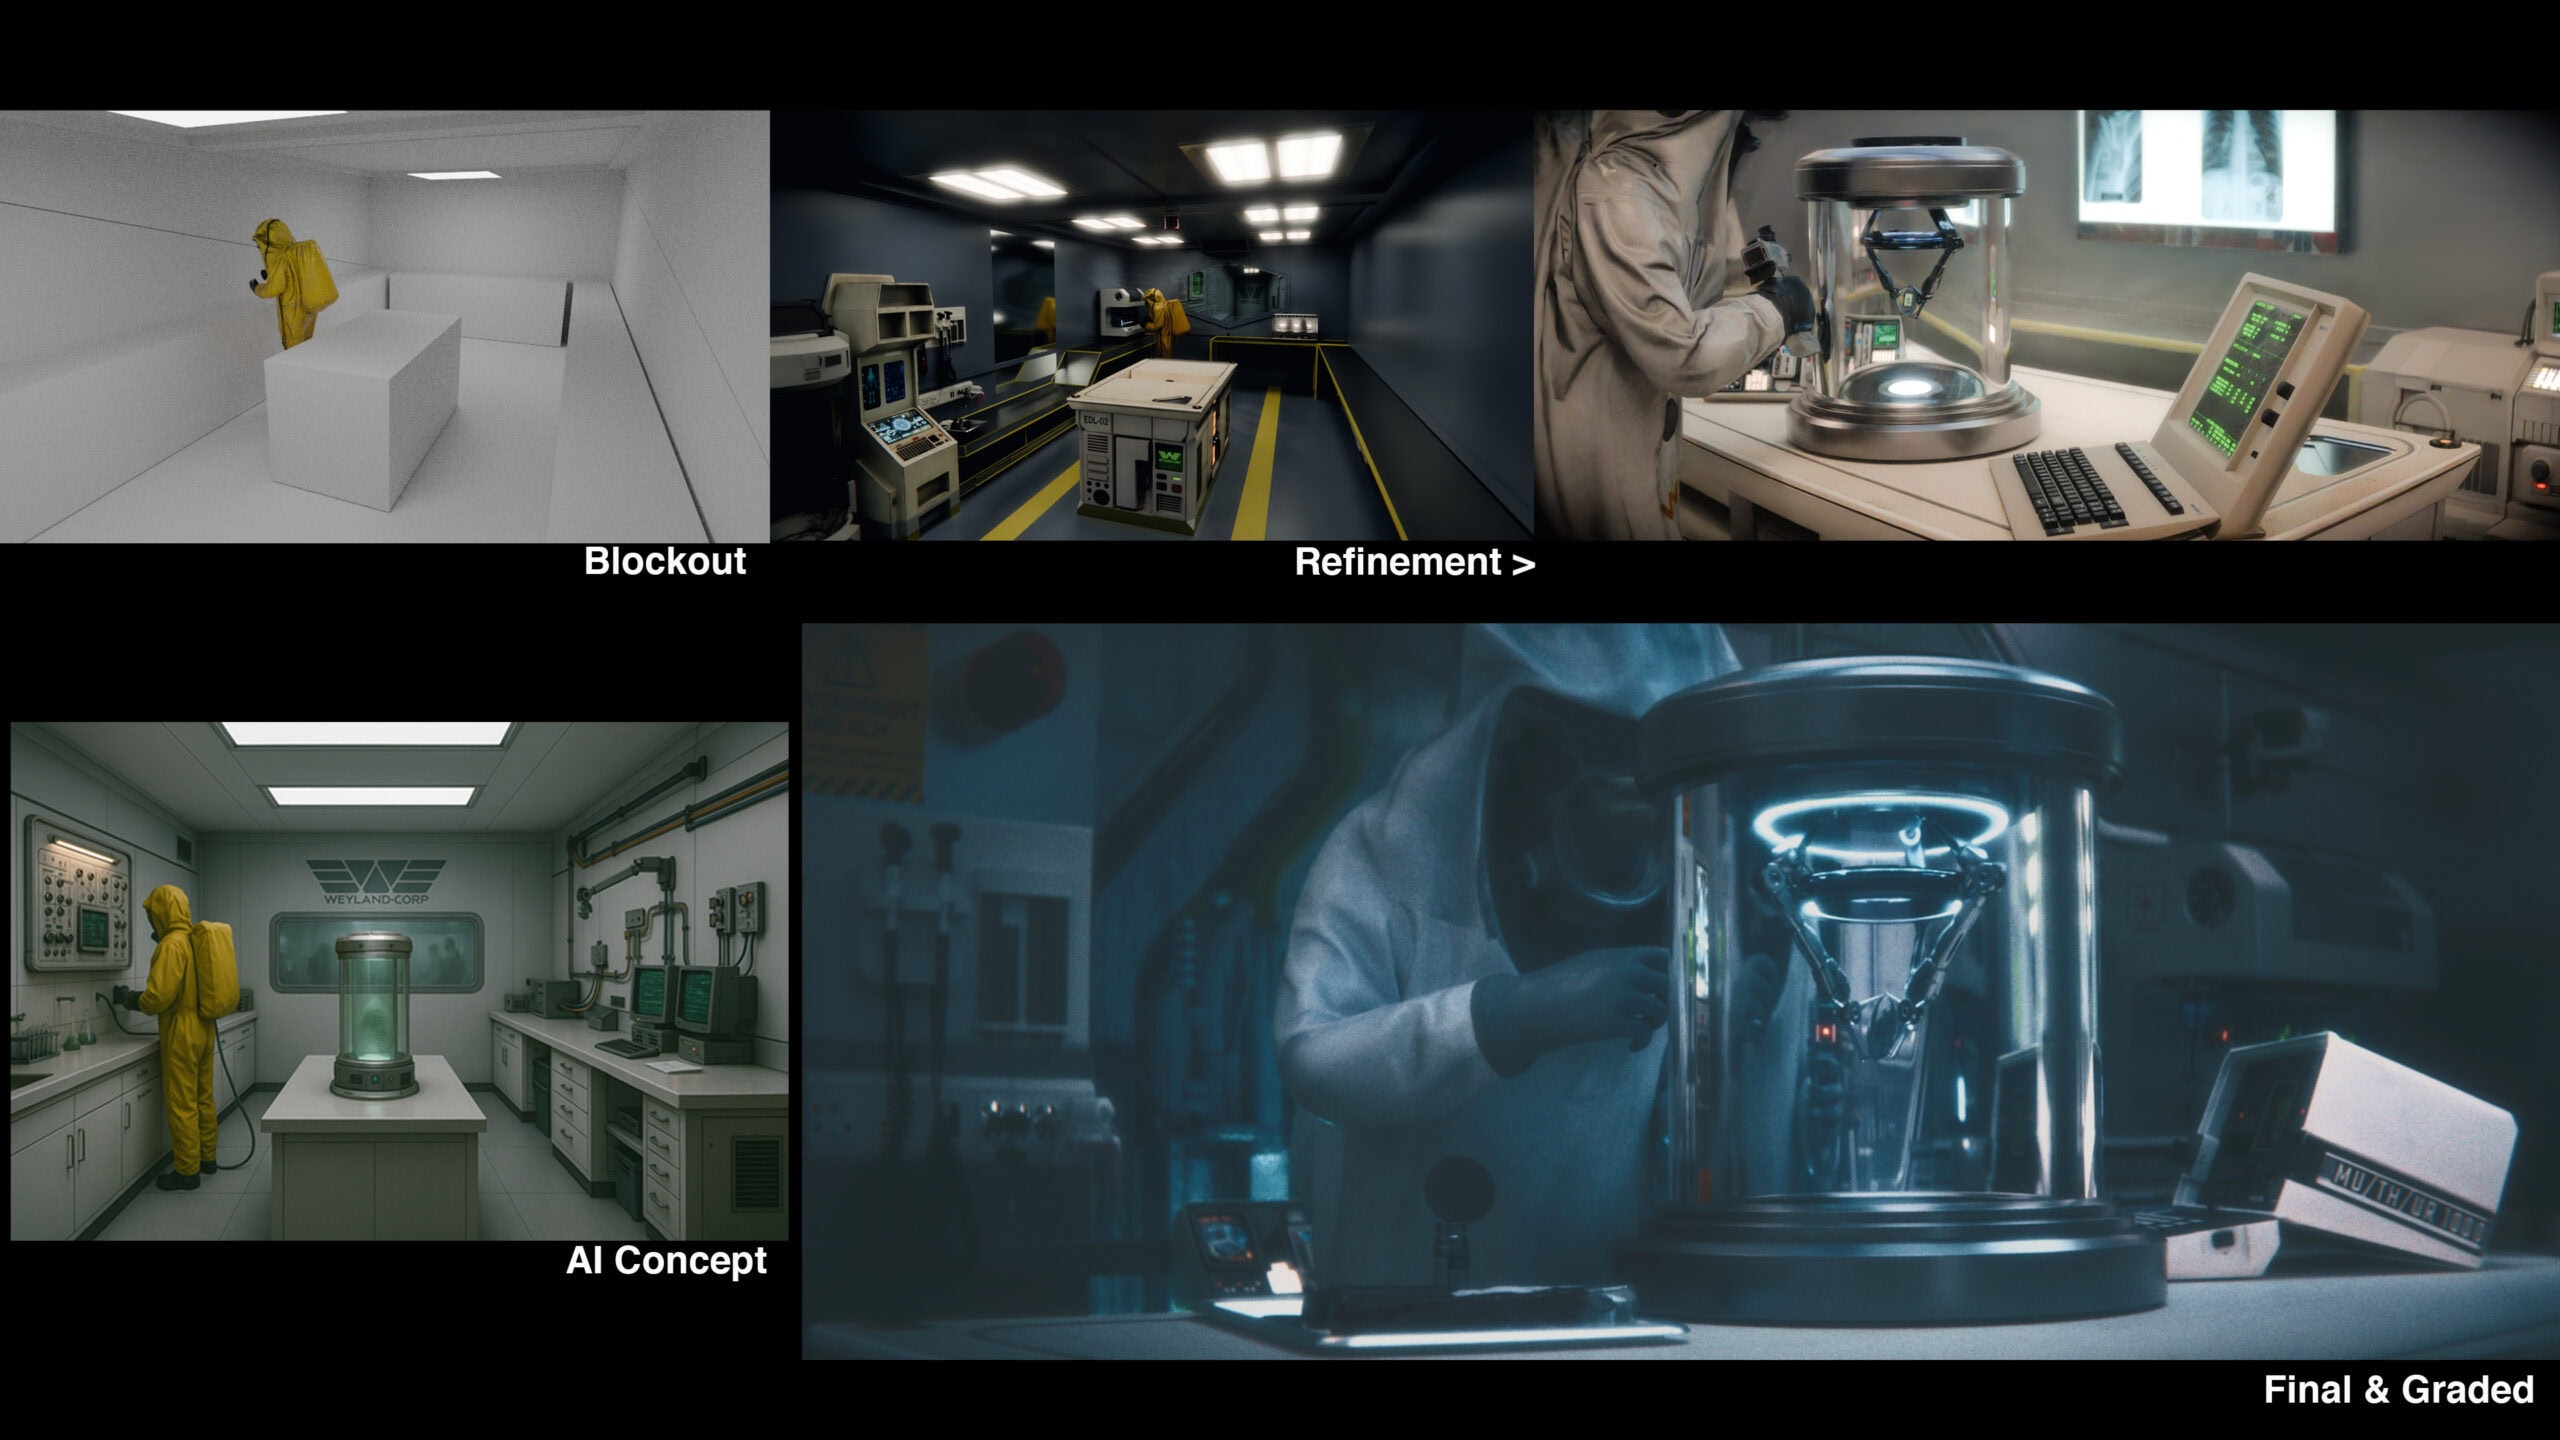
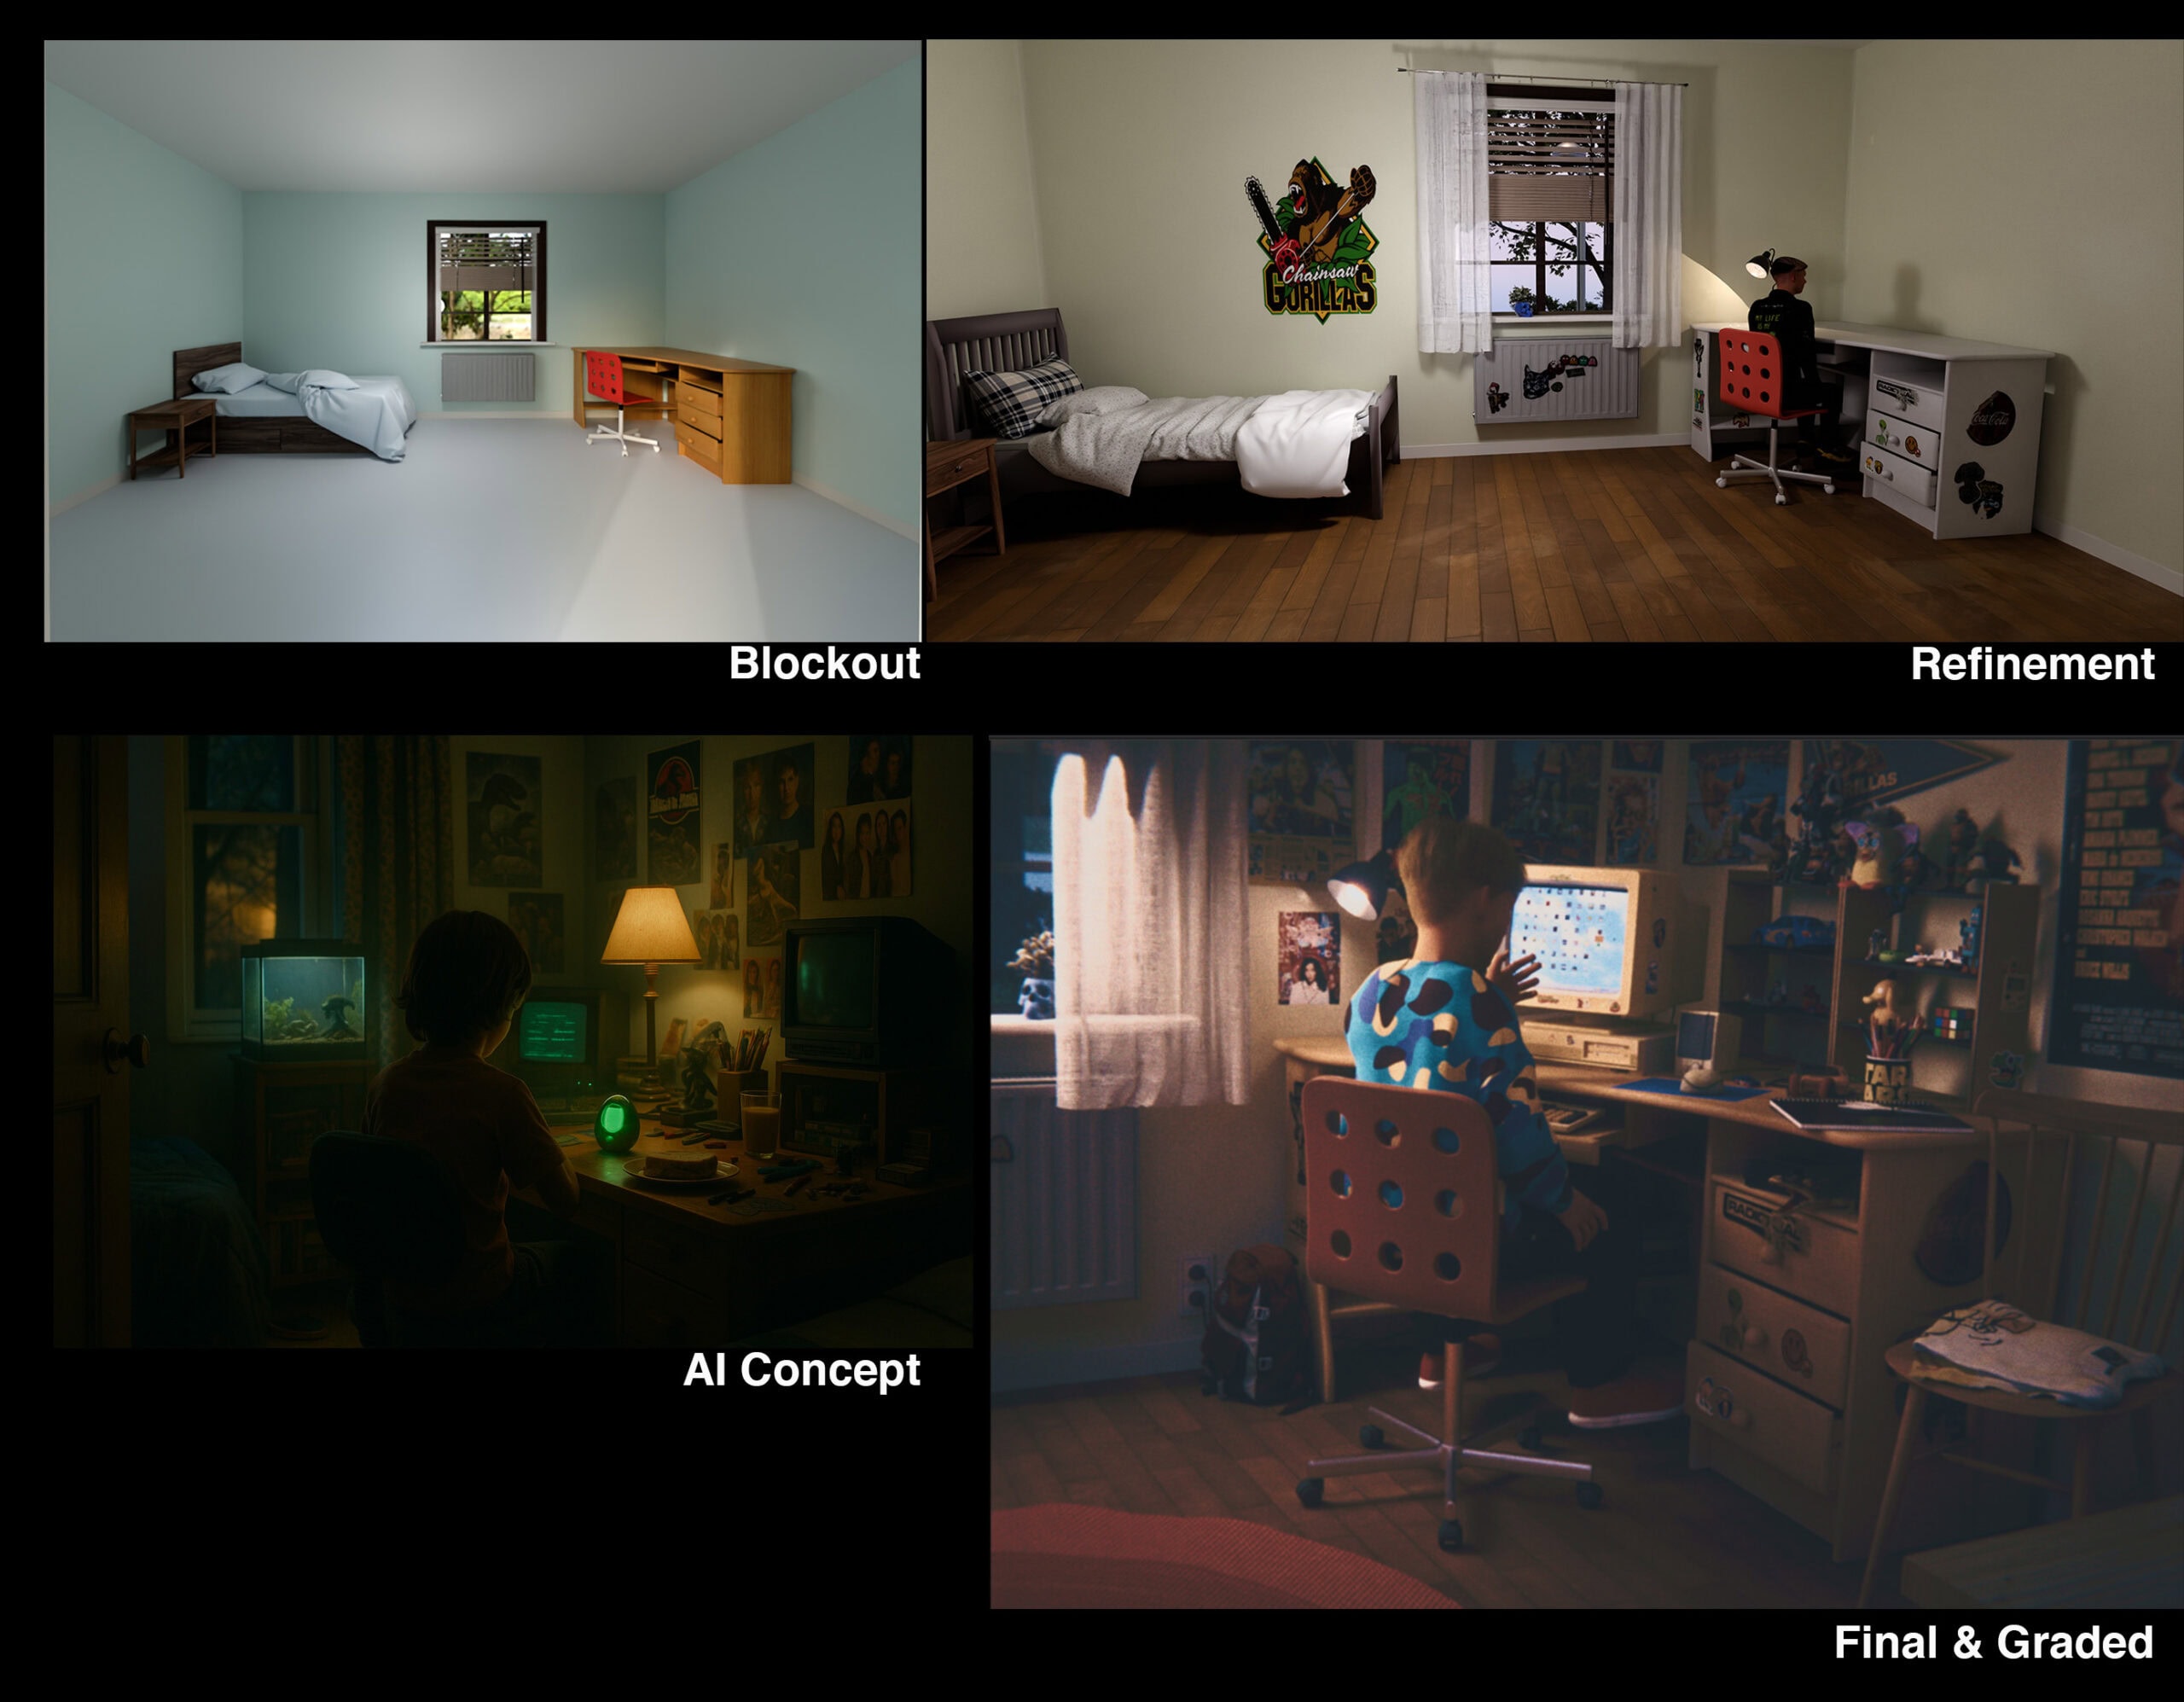
Every scene started the same way: a blockout in Blender and an AI-generated concept image. Not to let AI determine the direction, but to have something concrete to react to before committing to kitbashing and lighting. The concept image answers the question of mood and composition quickly, the blockout locks in scale and camera. From there the scene builds itself.
The lab in Part 1 and the kid’s bedroom in Part 2 show how the same method carries across completely different environments. One is a sterile Weyland facility, the other a cluttered 90s bedroom. The starting point is the same: concept, blockout, refine, grade.
POST PRODUCTION
WORKFLOW
The workflow was built around a single-scene approach in Blender, one file per part of the film, each using the same structure of named cameras switching via timeline markers. That kept the approach consistent across all five parts and meant a full render could be queued and left running unattended. Part 5 had significantly more markers due to the tight audio timing of the toy commercial format.

GRADING
A base grade was done in Blender then rendered out as OpenEXR for final grading handled in DaVinci Resolve. Each scene got its own node tree, moving from exposure and log conversion through lens blur, color correction and a final diffuse pass.
Part 5 got an additional VHS layer with chroma fringing, scanlines and horizontal wobble on top of the same base pipeline.


AUDIO
Audio was mixed entirely in Resolve with eight dedicated tracks split across voiceover, SFX layers and music, with individual EQ and bus routing.

For Part 5, all voiceovers were finalized and placed in Resolve before a single keyframe was set in Blender. The audio was exported as a single file and imported directly into Blender’s timeline. Every camera cut, logo slam and product shot was then animated against the actual voices rather than an estimated duration. It removes guesswork entirely and makes the difference between a spot that feels timed and one that feels edited.

TOOLS
Blender for all 3D work, rendering and animation. After Effects for pixel art animations and screen content. DaVinci Resolve for editing, grading and audio. Flux 2 Dev in ComfyUI for spritesheet generation and AI concept images. ElevenLabs for voice synthesis. Music and sound design from Epidemic Sound, Soundly and a personal library. Kitbashing assets from Big Medium Small, Kitbash 3D and Sketchfab.
REFLECTION
XenoGotchi started as a product mashup concept and a potential 3D model. Four script revisions later it had become a five-part anthology. The scope grew because each part kept asking for context, and the discipline was knowing when the answer was yes and when it was enough.
Some decisions were harder than others. The edit order went through several iterations, with an early version splitting the parts differently to make the narrative clearer for a first-time viewer. The current order holds together better as a single piece. Camera choreography in the kid’s bedroom alone went through more iterations than any other scene, small decisions about where the bed sits and how the camera enters the room that compound into whether the scene feels inhabited or staged.
Wan 2.2 was tested for generating video clips but cut from the final project. The output diverged too far from the visual language established in Blender, and consistency across the anthology mattered more than adding another tool to the pipeline.
A Japanese variant with a J-pop soundtrack and gashapon capsules was an early idea that didn’t make it. It would have been a narrower project for a narrower audience. The American 90s toy commercial register turned out to be the right frame for the O’Bannon thesis.
Five months, four script revisions, just under four minutes of film. Conceived and produced solo, alongside full-time work in the same field. The next project will be shorter. But this one didn’t run out of momentum, it ran out of scope.
